Piper visits Newlin Grist Mill

Regal Piper Pup

As you might expect, Piper’s arrival has had a big impact on our daily routine.  Matt and I are waking up earlier on work days, stopping home 2-3 times to let her out during the day, and (still!) taking turns setting an alarm for a middle-of-the-night potty break.  We are also making sure to do at least one mentally and/or physically stimulating activity with Piper every day to tire her out.  On weekdays it’s practically dark when we get home from work which limits us to activities around the house like wobble-disc practice in the kitchen or epic games of fetch in the back yard. (Fetch is, of course, frequently interrupted when Piper gets distracted and tries to eat deer poop, but I digress!)  Weekends, however, are a whole different story… daylight means that we can go hiking!

Hike hike hike

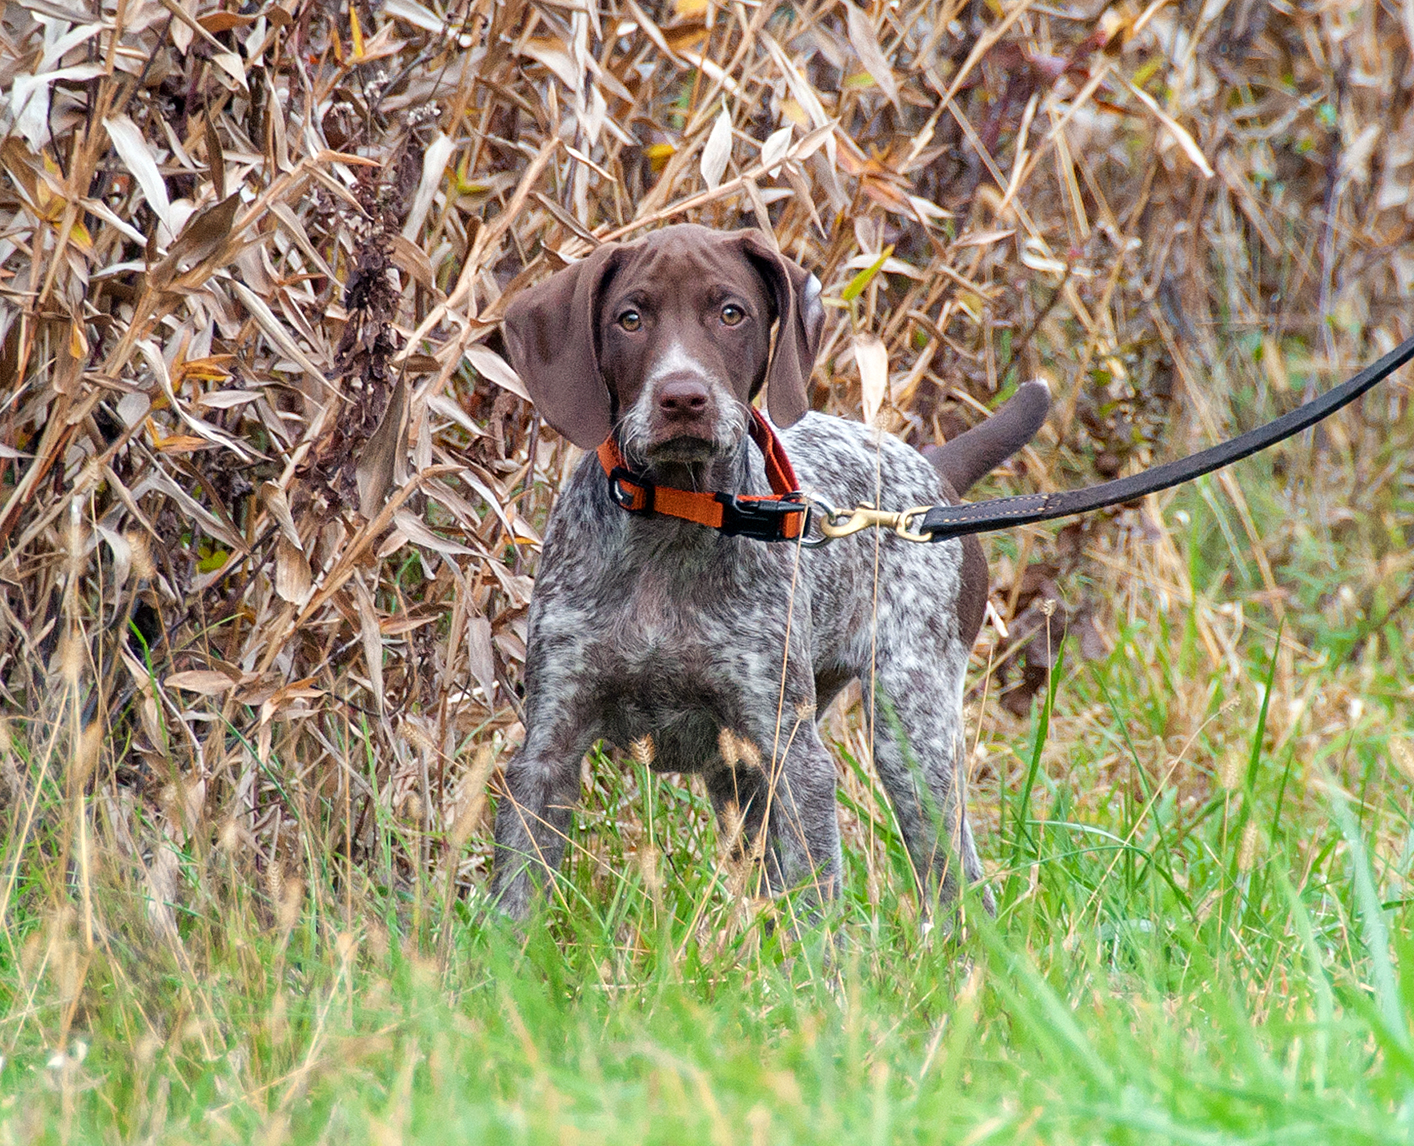
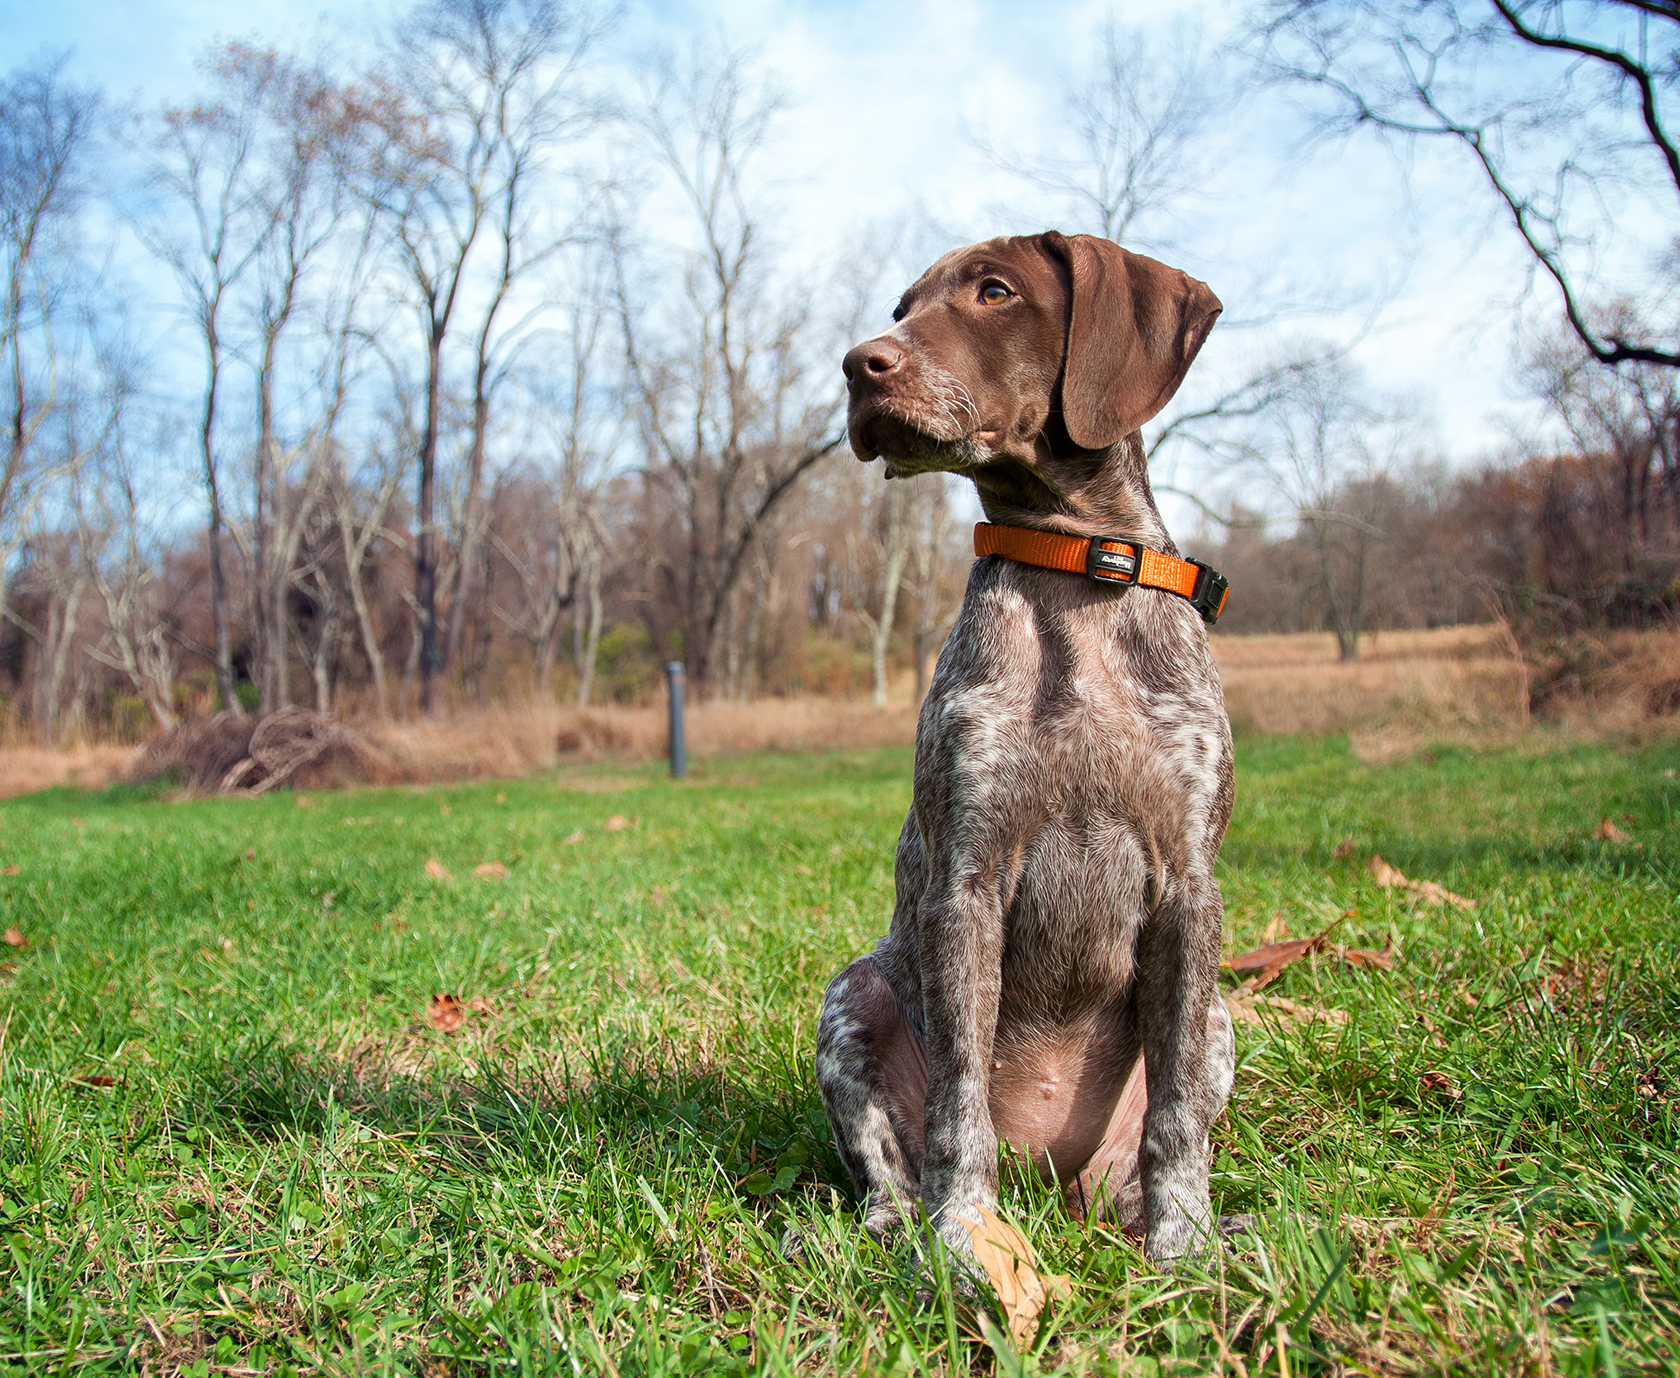
Since Piper is still very young, meandering hikes in the woods are a great way to tire her out without causing too much stress on her joints.  To keep things interesting, we’ve been visiting a different local park or trail each weekend.  This has been a fun way to re-explore some of our old favorite hiking spots that I’ve been meaning to blog about for a while.  One such local gem is Newlin Grist Mill.

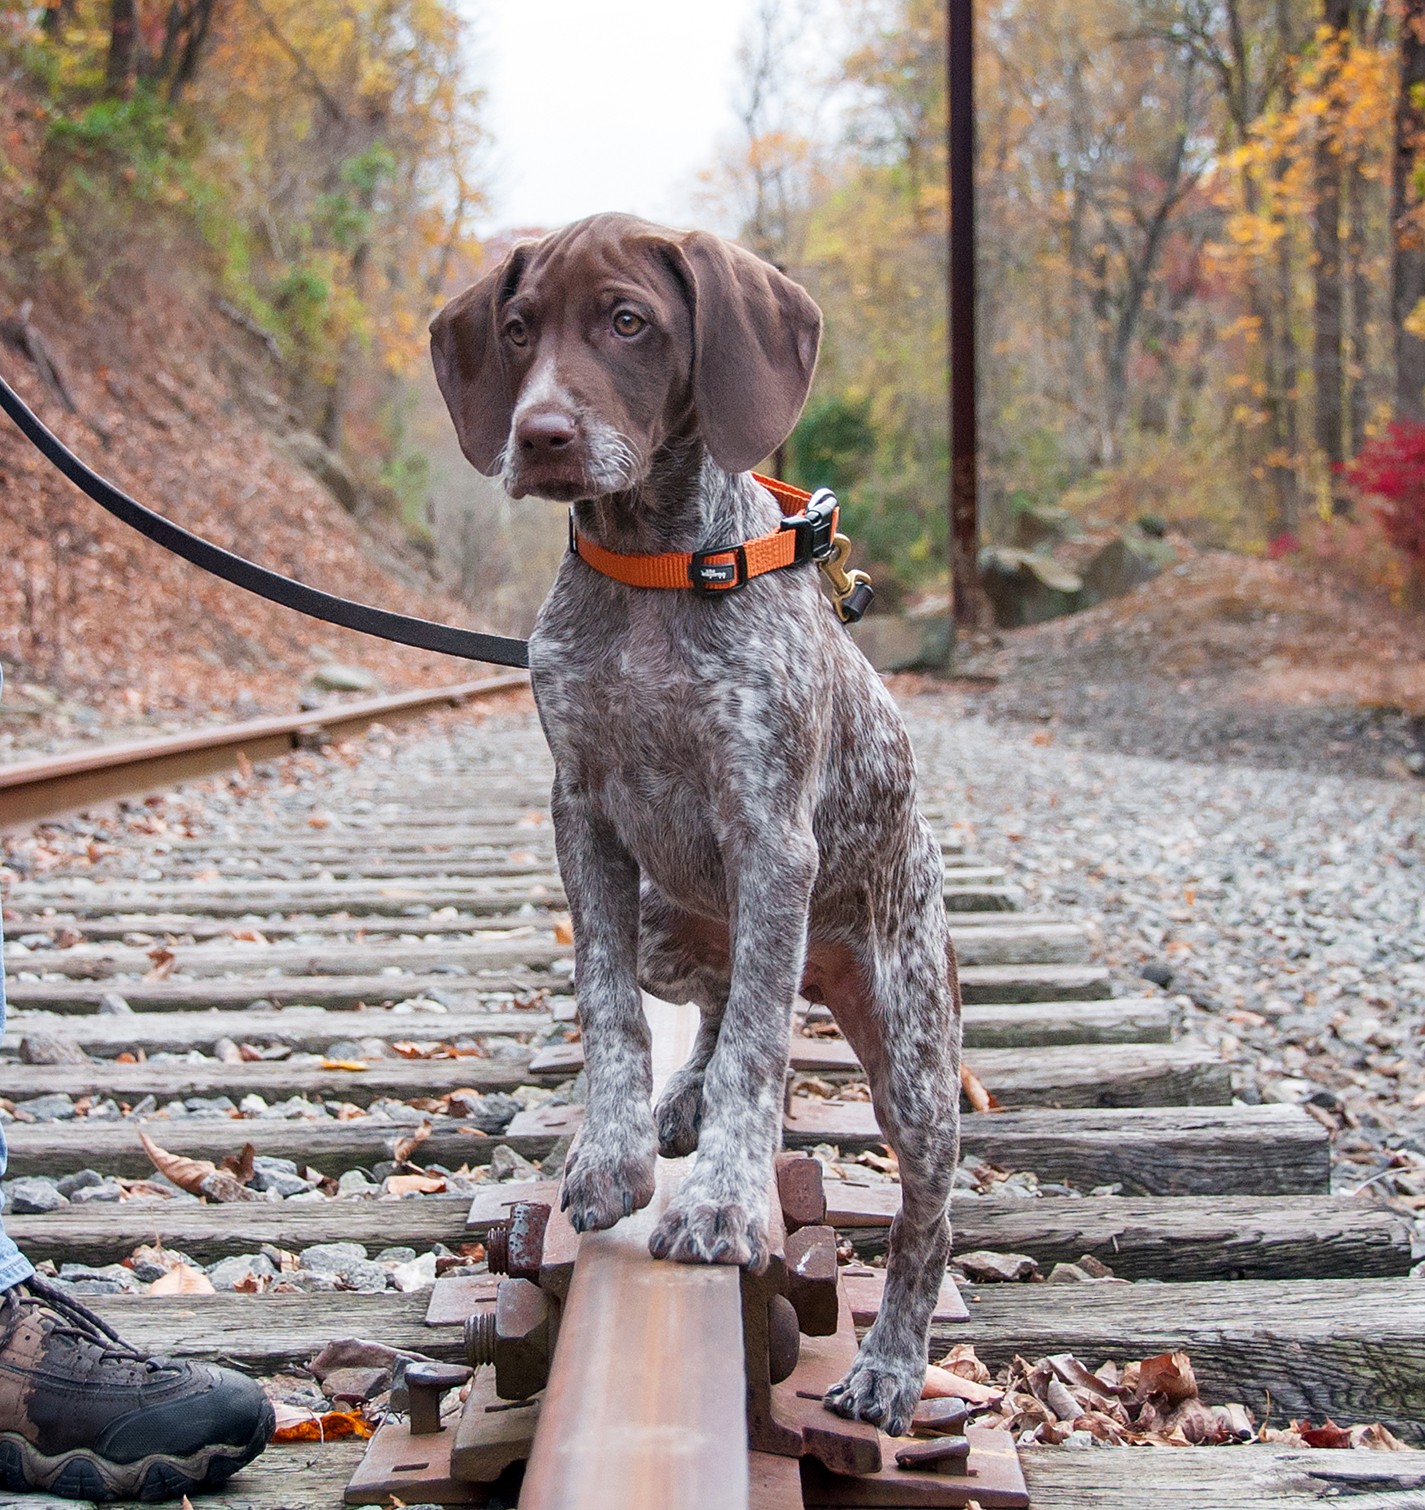
Newlin Grist Mill is a 160 acre park and historical site in Glen Mills, PA.  You can read more about the park’s history, working grist mill and educational programs on their web site.  I’m sure that all of that historical stuff is cool (convincing plug, right?) but WE visit the park for its miles of secluded nature trails that wind along an abandoned rail line and a beautiful stream.  Here are some photos from our hike a few weekends ago…

Newlin Grist Mill’s trails are well maintained and clearly marked, but I have not been able to find an actual detailed trail map of the park.  There’s a basic map at the parking lot showing park boundaries and general right-of-ways, but it’s missing most of the side trails that we actually hiked on.  Luckily, the park is relatively small and most of the major trails tend to be oriented east-west along the old rail line and stream.  This makes it hard to get lost and fun to explore… perfect for hiking with a 10-week-old puppy!

Oh Hi!

If you’re in the western Philadelphia suburbs and are looking for a low-key, relaxed hike with lots of stream views and history, I’d definitely recommend spending an afternoon at Newlin Grist Mill!

Newlin Grist Mill
219 South Cheyney Road
Glen Mills, PA 19342  (map)
www.newlingristmill.org

The Darlington Trail (Piper-style!)

Darlington Trail Hike 10-31-14On Halloween Matt and I took Piper hiking on the Darlington Trail.  The Darlington Trail is a public hiking trail in Middletown Township, Delaware County, PA that winds along Chester Creek and an abandoned section of railroad that once connected Media to West Chester.  Naturally, I brought my camera along to document this adventure and wanted to share a few of my favorite shots here.

Warning… lots of cute puppy photos ahead!!! 😊

Piper loved climbing around on the train tracks and even walked on one track balance beam-style for a few steps.

Piper on the train tracks 3Piper on the train tracks 1Piper on the train tracks 2

In order to get a good photo angle of little Piper I ended up lying down on the tracks, which put me at the perfect level for a surprise puppy attack!

Surprise puppy attack on the tracks!

Piper was a total ham on the hike and kept pausing to look at the camera.

Piper 3PiperPiper the GSP PuppyPiper 2

Even when Piper got a break from walking she still made a point of looking at the camera!

Piper keeping an eye on me Piper takes a break from hiking

At the end of the hike little Piper happily snoozed in my arms on the drive home.  She is such a sweetie.

Piper sitting in the grass-

That’s it for this hike, but don’t worry, I have photos from a more recent hiking adventure that I will share soon!  🙂

Apple Crisp

It’s October, which means that mornings are starting out clear and cool, evenings are getting darker sooner, leaves are changing colors, and we finally closed the windows in our bedroom (but don’t worry, the heat won’t be on for another few weeks!).  You know what else happens in October??  APPLE CRISP SEASON!!!  Yes, it’s officially the best time of year to enjoy warm, cinnamon-y baked apples with a sugary, spice-filled topping and a scoop of creamy vanilla ice cream on top.  YUM!!

Apple Crisp

Matt’s dad visits up state New York every fall and inevitably returns with dozens of freshly picked McIntosh apples.  When we were at Matt’s parents’ house last weekend we loaded up a big grocery bag full of apples and then set about finding an apple crisp recipe worthy of the season.

Like many of my favorite recipes, the recipe below is from our trusty cookbook, The New Best Recipe.  I can’t stress enough how fantastic this cookbook is.  It has detailed, easy to understand instructions, long intros about how and why the authors chose certain ingredients or cooking methods, and tons of illustrations.  Not that you really need an illustration for apple crisp, but that feature has definitely come in handy for some of the more complicated recipes that we’ve attempted.

Apple Crisp

With this back story in mind, it should come as no surprise that this recipe for apple crisp turned out perfectly.  The McIntosh apples melted into a flavorful, applesauce-like filling and the firmer Granny Smiths held their shape and gave the crisp a good texture.  There’s just the right amount of tart lemon to offset the sweetness of the apples and the topping was absolutely delectable.  In fact it’s making my mouth water right now just looking at the photos!!! 🙂

Apple Crisp (serves 5-6, from The New Best Recipe)

For the topping…
6 tablespoons Flour
1/4 cup Light Brown Sugar, packed
1/4 cup Granulated Sugar
1/4 teaspoon Cinnamon
1/4 teaspoon Ground Nutmeg
1/4 teaspoon Salt
5 tablespoons cold, unsalted Butter, cut into 1/2-inch pieces
3/4 cup coarsely chopped Almonds, Pecans, or Walnuts (I used sliced almonds)

For the filling…
3 McIntosh Apples, peeled and cut into 1 inch chunks
3 Granny Smith Apples, peeled and cut into 1 inch chunks
1/2 teaspoon Grated Zest and 1 1/2 tablespoons Lemon Juice
1/4 cup Granulated Sugar

Vanilla Ice Cream

Directions:
Start by making your topping.  Combine the flour, sugars, spices and salt in the bowl of a food processor.  Blend for a few seconds to mix.  Add in the pieces of butter and pulse the food processor 10 times for 4 seconds each.  Don’t overmix the topping.  Accordingly to the original recipe, your topping will first look like dry sand, then like coarse cornmeal.  Add in the nuts and pulse again 4-5 times for 1 second each.  Refrigerate the topping for at least 15 minutes while you prepare the filling.

To make the filling, combine the apples, zest, lemon juice and sugar in a large bowl and mix well to coat the apples.  Use a spatula to transfer the apple mixture to a 9-inch deep dish pie plate (make sure to scrap the sides of the bowl to get all of the sugar and lemon flavor!). 🙂

Sprinkle the chilled topping evenly over the apple mixture.  Bake the crisp in a preheated 375° oven for 40 minutes, then increase the heat to 400° and bake for another 5 minutes until the topping is golden brown.  Remove the crisp from the oven and allow it to cool slightly for 10-15 minutes or as long as you can wait… it will smell GREAT at this point!  Serve warm with a scoop of vanilla ice cream on top.

1171 Apple Crisp

Farewell Summer Flowers, Hello Pumpkin Beer!

Happy October!  I love this time of year.  Cool, crisp mornings, changing leaves, lots of apples and, soon, pumpkin-flavored everything.  Call me crazy, but I like to wait until it really feels like autumn before going on pumpkin overload.  (My one exception is pumpkin beer… Southern Tier Pumking is the best!)

The only thing that I don’t like about fall is that my once-lush summer garden inevitably wilts and dies as the temperatures drop and the days get shorter.  Luckily it appears that my garden hasn’t yet gotten the memo about it being October because everything is still vibrant and perfect as of today.  It’s hard to believe that in a few weeks I’ll be tearing out those zinnias, dahlias, pepper plants and other summer growth as I prep the garden for winter.

I took numerous photos of the flowers in my garden over the summer and thought that October 1st would be the perfect day to share their summer beauty before the garden transitions to fall.  Farewell, summer flowers, and hello, pumpkin beer!!

Is there anything about autumn that you don’t like?
Does the arrival of pumpkin beer make up for it?  🙂
What’s your favorite pumpkin-flavored item at this time of year?

Birthday Walk at Ridley Creek

Last Friday was my birthday, woohoo!  Because we were entered to run in the Trinity 5K at 9AM Saturday morning we kept Friday’s celebrating pretty low key.  We got breakfast at Manhattan Bagel (my favorite) and worked a full day while hydrating like crazy for the race.  After work we took a nice walk with Bailey at Ridley Creek State Park before eating a pasta dinner and getting a good night’s sleep.  Here’s a photo of my Ridley Creek walking buddies… the perfect birthday companions!  🙂

380 Matt and Bailey

The weather was gorgeous during our walk.  Since we weren’t planning on doing any running in the park I brought my camera along to capture the beautiful autumn colors and my favorite photo subject, Bailey.  Here are a few of the photos I took:

Bailey hasn’t been to Ridley Creek State Park since I hurt my foot in late September.  She was so happy to be out and about again!  She was sporting her new ‘walkeez’ fleece harness and she paused for lots of photo ops.  She’s such a good dog!

Bailey

Hiking in the park with Matt and Bailey was the perfect way to spend my birthday.  What’s your idea of the perfect birthday afternoon?

Trinity Presbyterian 5K

This morning Matt and I completed three race weekends in a row with the Trinity Presbyterian 5K Run/Walk in Berwyn, PA.  The course wound through Berwyn’s neighborhoods and took us right by my grandparents’ old house.  I have many fond memories of their neighborhood (it’s where I learned to ride a bike!) so it was neat to run through it during the first mile of the race.

Annie at Trinity 5K

This was the most competitive race that we’ve gone to so far.  The guy who won finished in 16 minutes!!  Matt finished 13th overall with a 24:31 and I was 16th overall and 3rd place female with a 25:48.  We both didn’t feel as fast as we did in last weeks’ Oy Vey 5K but that’s probably because today’s race ended with a looooong uphill climb.  I had to walk a little up the hill but I’m still very happy with my second sub-26 minute time in 2 weeks!

Matt at Trinity 5K

Today’s weather was absolutely gorgeous.  The Fall leaves were at their peak color, the cloud-streaked blue sky looked like a work of art, and the temperature was in the mid-fifties.  I snapped this photo of Trinity Presbyterian Church before the race went off.  Wasn’t it beautiful out?

Trinity Presbyterian Church Berwyn

I finally figured out how to edit my run on Runkeeper to show the correct time which is good since I’m not usually very quick about hitting “end run” on my iPhone when I cross the finish line.  Here’s the official Runkeeper recap.  I’m proud of that 6:59 first mile split but as expected I slowed down big time at the end… that final hill was evil!!

Trinity 5K Runkeeper Stats

After three weekends in a row Matt and I now get to enjoy a few weeks off from racing.  Our next 5K is Thanksgiving day and I’m already looking forward to it!

Miles since last post:  21.9
Days since last post:  6
Average Daily Miles since July 18th: 4.84
TOTAL MILES: 523.2

Related Posts:
•  Oy Vey 5K (10/27/13)
•  Fueled Up & Fired Up 5K (10/19/13)
•  Limping my Way to 400 Miles (10/3/13)
•  Run-A-Muck 5K (9/22/13)
•  300 miles and a 5K in my future (9/9/13)
•  200 miles!  (8/26/13)
•  100 Miles in 21 Days! (8/7/13)
•  100 Mile iPad Mini Challenge: 49 Miles to Go! (7/29/13)
•  The Challenge Begins: 100 Mile iPad Mini Challenge (7/23/13)

Nürnberger Bratwurst with Sauerkraut

Happy October!  The German holiday of Oktoberfest may have ended on October 6th, but, like many Americans, Matt and I use this holiday as an excuse to enjoy German bratwurst and beer for the entire month of October.  Last night’s dinner was no exception…  We used a German recipe to make authentic Nürnberger Bratwurst with Sauerkraut, mashed potatoes, and crispy onion rings.  YUM!

Bratwurst and Sauerkraut

We purchased our Nürnberger (aka Nuremberg) Bratwursts from a fresh sausage vendor at our local Farmer’s Market.  The vendor explained that, unlike most brats you’ll find in a supermarket, Nürnberger Bratwursts are very small (about 4″ long x 3/4″ diameter) and are not served hot dog-style on a roll.  Instead, several of these tiny sausages are served together over a bed of warm sauerkraut.  This sounded good to us and, after some online searching, I found this authentic recipe to showcase these little brats.  Naturally the recipe was written in German but with a combination of my limited German language skills from school and some help from Google Translate we came up with the following English version.

Kartoffelpüree mit Bratwurst und Sauerkraut
Mashed Potatoes with Bratwurst and Sauerkraut  –  Translated from Lecker.de

You will need…
3 Yellow Onions
2 1/4 lbs. Yukon Gold Potatoes, peeled and roughly cut into 2×2″ chunks
200ml (approx. 7/8 cup) Skim Milk
40g (just under 3 tablespoons) Butter, divided in half
1/2 bunch Chives, sliced into very thin rounds
Grated Nutmeg
Peanut Oil
28 oz. Jar of Sauerkraut (available in the canned veggies aisle)
375ml (approx. 1.6 cups) Chicken Broth
5-6 Juniper Berries*
1 Bay Leaf
12-16 Nuremberg Sausages (Nürnberger Rostbratwurst)
1/4-1/2 cup Flour, for dredging
Salt and Ground Black Pepper, to taste

Bratwurst and Sauerkraut

Directions:
Slice the onions to form thin rings (as thin as you can make them without breaking the ring).  Set the onion rings aside and reserve the centers or any rings that break.  Dice the centers.  You should end up with approx. 1/3 diced onion and 2/3 onion rings.

Place the peeled potatoes in a pot with salted water, cover, and boil for 20 minutes until soft.  Drain the potatoes.  Place the milk and 20 g (half) of the butter in the potato pot and warm over low heat.  Return the potatoes to the pot, mash well, and add a few pinches of chives, ground nutmeg, and salt to taste.  Stir well and cover.

Meanwhile, in a large frying pan, saute the onions in peanut oil over medium high heat for 2-3 minutes.  Add the sauerkraut (spoon it out of the can to avoid getting excess juice) and saute for 5-10 minutes, stirring frequently.  Then, stir in the broth, juniper berries, and bay leaf.  Cover and simmer for 20 minutes, stirring once or twice.  Once cooked, transfer the sauerkraut mixture to a bowl and cover tightly to keep warm.

Use a paper towel to remove any remaining bits of sauerkraut from your frying pan, then return the pan to medium-high heat and heat a tablespoon of oil.  Add the bratwurst to the pan and cook in the oil until crispy brown on all sides, turning frequently (use a splatter screen to minimize the mess).  Transfer cooked bratwurst to a plate and cover tightly with foil.

Return the frying pan to medium-high heat and add in the remaining 20g butter.  Dredge the onion rings in flour and spread them in a single layer on the bottom of the pan – you’ll need to do this in batches.  Fry the onions in the butter until golden brown and crispy.  Transfer the cooked onions to a paper towel-lined plate and continue to fry the dredged onion rings in batches until they are all done.

Bratwurst und Sauerkraut
To serve your Kartoffelpüree mit Bratwurst und Sauerkraut, spoon generous helpings of mashed potatoes and sauerkraut onto a plate.  Place 3-4 bratwurst over top of the sauerkraut and garnish the potatoes with chives.  Stack the onion rings on top of the potatoes and serve with a nice cold German beer.  Enjoy!

*Juniper Berries are a common element in northern European cooking and in this recipe they are used to flavor the Sauerkraut.  We searched for Juniper Berries in six (SIX!) different grocery stores before finding them in our usual store, The Fresh Market.  (Too bad we didn’t try there first!)  If you can’t find Juniper Berries locally you can order them online at Spices, Inc.

Caramel Corn with Honey-Roasted Peanuts

Last weekend our neighborhood had its annual Fall bonfire party.  The food was potluck-style so we initially decided to celebrate the season by making Thai Pumpkin Soup.  Then the weather took a crazy turn and it ended up being 85 degrees and humid (very unusual for October in Pennsylvania!) and we quickly realized that no one was going to be in the mood to eat soup.  So, at the last minute we changed course and made a nice summery Mediterranean Quinoa Salad instead.  We didn’t want to be too healthy though, so we supplemented our potluck offering with some delicious homemade caramel corn!

721 Caramel Corn

This was our first time making caramel corn and I was amazed by how simple it was.  Granted, it was a bit labor intensive (we had to stir the popcorn every 15 minutes for an hour and a half) but there were no fancy candy thermometers or gadgets required.  Just a wok, some popcorn kernels, butter, sugar, corn syrup and honey roasted peanuts… easy!

We referred to our go-to Asian cookbook, Stir-Frying to the Sky’s Edge, for instructions on how to pop the popcorn in our wok (it’s a great way to season a wok!) and I used this recipe  Leite’s Culnaria for the caramel recipe and baking instructions.  We threw in some store-bought honey-roasted peanuts to kick the recipe up a notch and I would say that our homemade caramel corn turned out pretty perfect.  I think Matt would agree… he couldn’t stop eating it even as I was trying to take this photo!  🙂

738 Matt steals some caramel corn

Caramel Corn with Honey-Roasted Peanuts (adapted slightly from Leite’s Culinaria)

You will need…
1 cup uncooked Popcorn Kernels, divided
Peanut Oil
1 1/2 sticks Butter
1 cup Brown Sugar, packed
1/3 cup Light Corn Syrup
1 teaspoon Salt
1 teaspoon Baking Soda
1/2 cup Honey Roasted Peanuts

Directions:
Pop the popcorn kernels.  To do this in a wok, heat approx. 1 tablespoon of peanut oil in your wok over medium heat.  Put 3-4 kernels in the wok and cover.  (For easier clean up, wrap the inside of your wok lid with aluminum foil!)  When the test kernels in the wok pop, add in approx. 1/3-1/2 cup of kernels and re-cover.  (If test kernels don’t pop, slowly increase the heat until they do, then add in the other kernels.)  Shake the wok over the burner to keep it moving as the kernels heat up.  In a few minutes the kernels will start to pop.  Keep shaking until popping slows down, then carefully tilt the cover open and transfer the popped corn to a large baking dish.

Repeat this process with the remaining kernels until all of your popcorn is popped.  You may need to use multiple baking dishes to hold your popcorn… you’ll be stirring it later so it’s better to leave some extra space!  Add the honey-roasted peanuts to the popcorn and place in a 200°F oven to keep warm.

How to pop popcorn in a wok

Prepare your caramel by heating the butter and sugar over medium heat.  Add in the corn syrup and salt and bring to a boil.  Allow the mixture to boil for 5 minutes, stirring occasionally.  After 5 minutes, remove the mixture from heat and carefully stir in the baking soda.  Remove the popcorn from the oven and pour the caramel mixture evenly over the popcorn.  Mix well with tongs (don’t worry if every kernel isn’t coated at this point, though) and return the popcorn to the 200° oven.

Bake the popcorn for 1 1/2 hours at 200°F, stirring and tossing thoroughly every 15 minutes.  Allow the popcorn to cool before eating (if you have the willpower to wait!).  Enjoy it immediately or store it in an airtight container for as long as it lasts (which won’t be long… it’s delicious!).

Stirring the caramel corn

Above: Caramel Corn during a stirring break.  Below: The finished product!

Caramel Corn

Thai Pumpkin Soup

Happy Autumn!  Last Sunday Matt and I celebrated the arrival of Fall by making pumpkin soup.  And this wasn’t just any pumpkin soup… it was THAI pumpkin soup with fresh ginger, coconut cream and jalapeños in it… yum!  We topped it off with a dash of hot Sriracha sauce, a few salty peanuts and some sprigs of fresh cilantro and it was delicious!!

Thai Pumpkin Soup

I discovered this recipe in the cook book that came with our glorious Vitamix blender.  The Vitamix (predictably) made quick work of pureeing the soft ingredients for this soup but you certainly don’t need a Vitamix to make this… I’m pretty sure that an immersion blender would allow you to whip up a pretty tasty Autumn soup as well.  🙂  Without further ado, here’s the recipe!

Thai Pumpkin Soup (adapted from the Vitamix ‘Create’ Recipe Book)

You will need…
Olive Oil
1 Onion, choppedThai Pumpkin Soup
1 tablespoon Tomato Paste
2  1/2 cups Canned Pumpkin
2 tablespoons fresh Ginger, chopped
1 clove Garlic, chopped
3 cups Chicken Broth (or vegetable broth, for vegetarian soup)
1 teaspoon Green Chiles, chopped (we used Jalapeños)
1 cup Lite Coconut Milk
1/2 cup Cream of Coconut
1 tablespoon Lemon Juice
Salt and Pepper, to taste

Optional Garnishes:
Chopped Peanuts
Cilantro
Sriracha
Sour Cream

Directions:
In a large pot, saute the onion in olive oil over medium-high heat until translucent.  Add the tomato paste, pumpkin, ginger, garlic and broth and stir well.  Bring the mixture to a slow simmer then remove from heat.

If using a VItamix or other high-powered blender, pour the pumpkin mixture into the blender and add in the green chiles, coconut milk, cream of coconut and lemon juice.  Blend on high power for 25-30 seconds, then season with salt and pepper to taste.

If using an immersion blender, add the green chiles, coconut milk, cream of coconut, and lemon juice to the warm pumpkin mixture.  Use the immersion blender to puree the mixture into a smooth soup.  (Note:  I did not use an immersion blender so I don’t know how long this will take, but I’m sure it’s doable!)

Transfer the pureed pumpkin soup into bowls and garnish.  Our favorite combination of garnishes was a dash of Sriracha with a sprinkling of peanuts and a few sprigs of cilantro.  The Vitamix book recommended a dollop of sour cream with peanuts and cilantro… choose whatever sounds good to you!

Thai Pumpkin Soup

Above: Our favorite garnish combination of Sriracha, peanuts and cilantro.
Below: Garnished according to the cook book with sour cream, peanuts and cilantro.

Thai Pumpkin Soup

What’s your favorite Fall pumpkin recipe?
Tell me about it in the comments or post a link!

Weekly Photo Challenge: An Unusual POV

This week’s WordPress Weekly Photo Challenge is “An Unusual Point of View.”  I think that this photo of the beautiful lake at Promised Land State Park in Greentown, Pennsylvania fits the theme fairly well:

A different POV- Promised Land Lake thru the Conservation Island Bridge

I snapped this shot just as Matt and I canoed under a low bridge on a gorgeous October day.  It’s hard to believe that Summer’s lush green trees are going to look like this in another month… I can’t wait!!  🙂