Roasted Corn Salsa

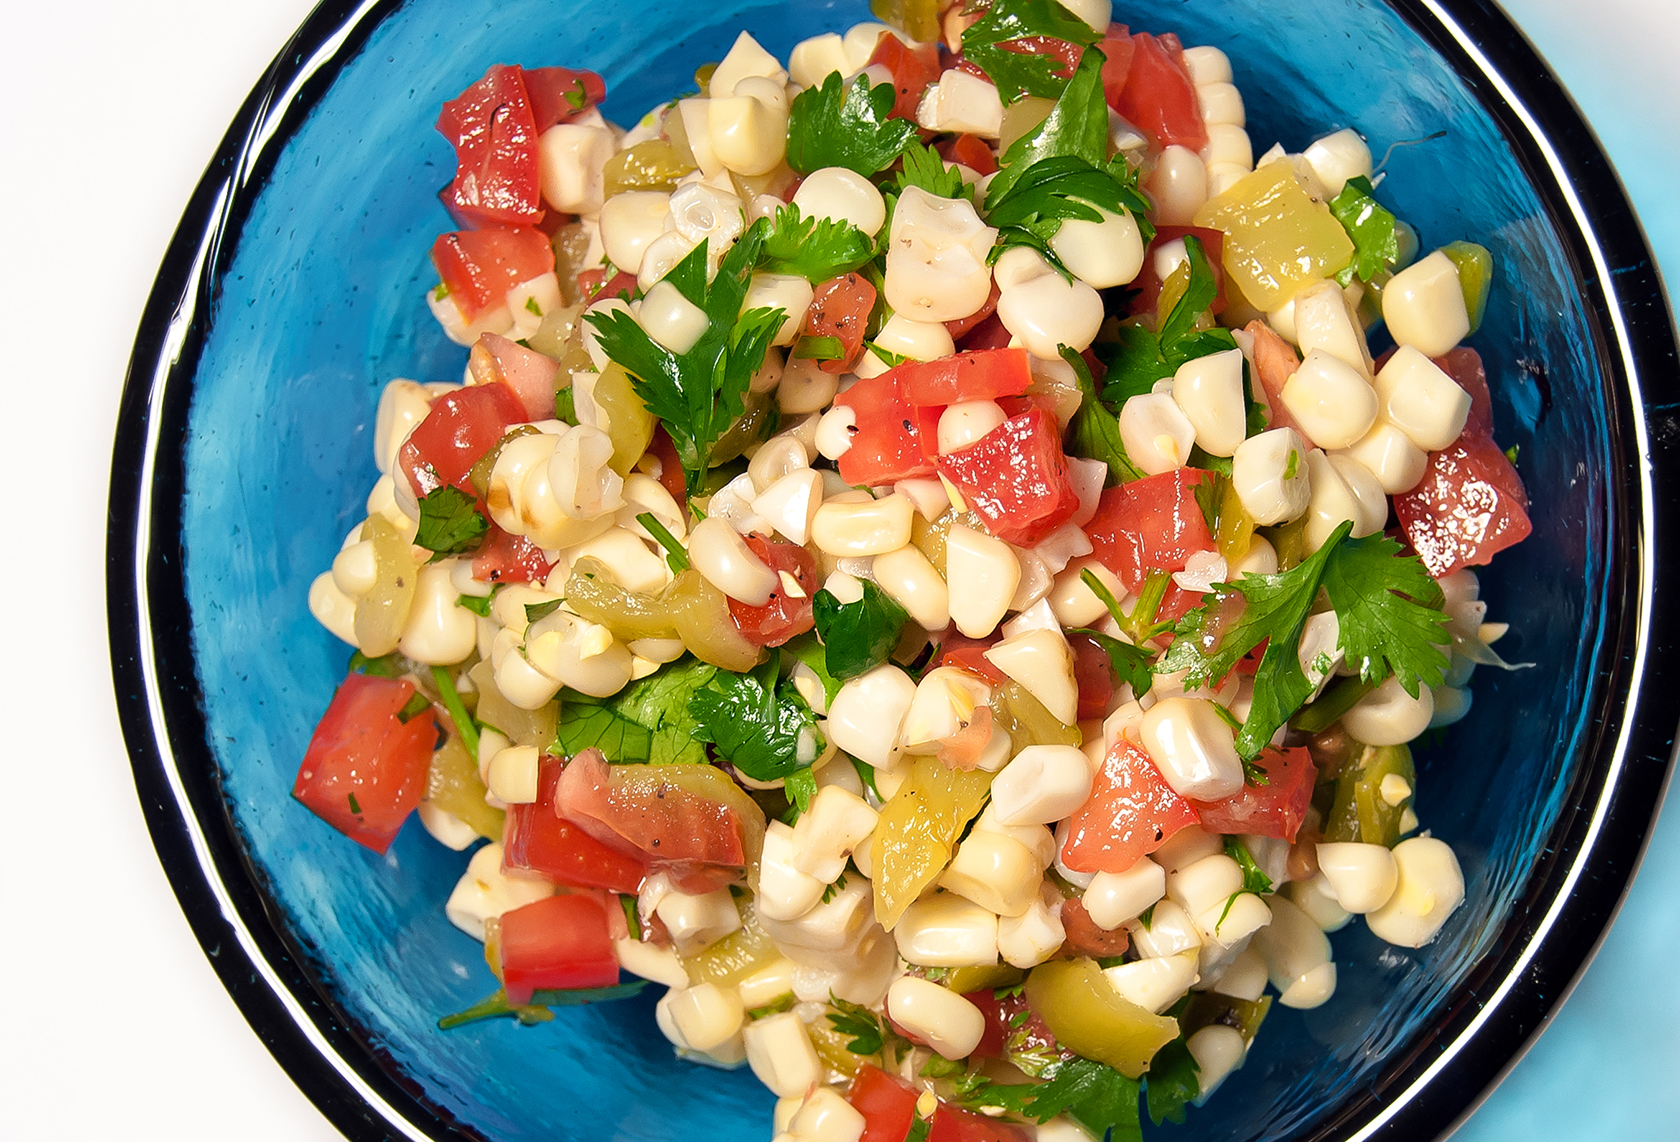
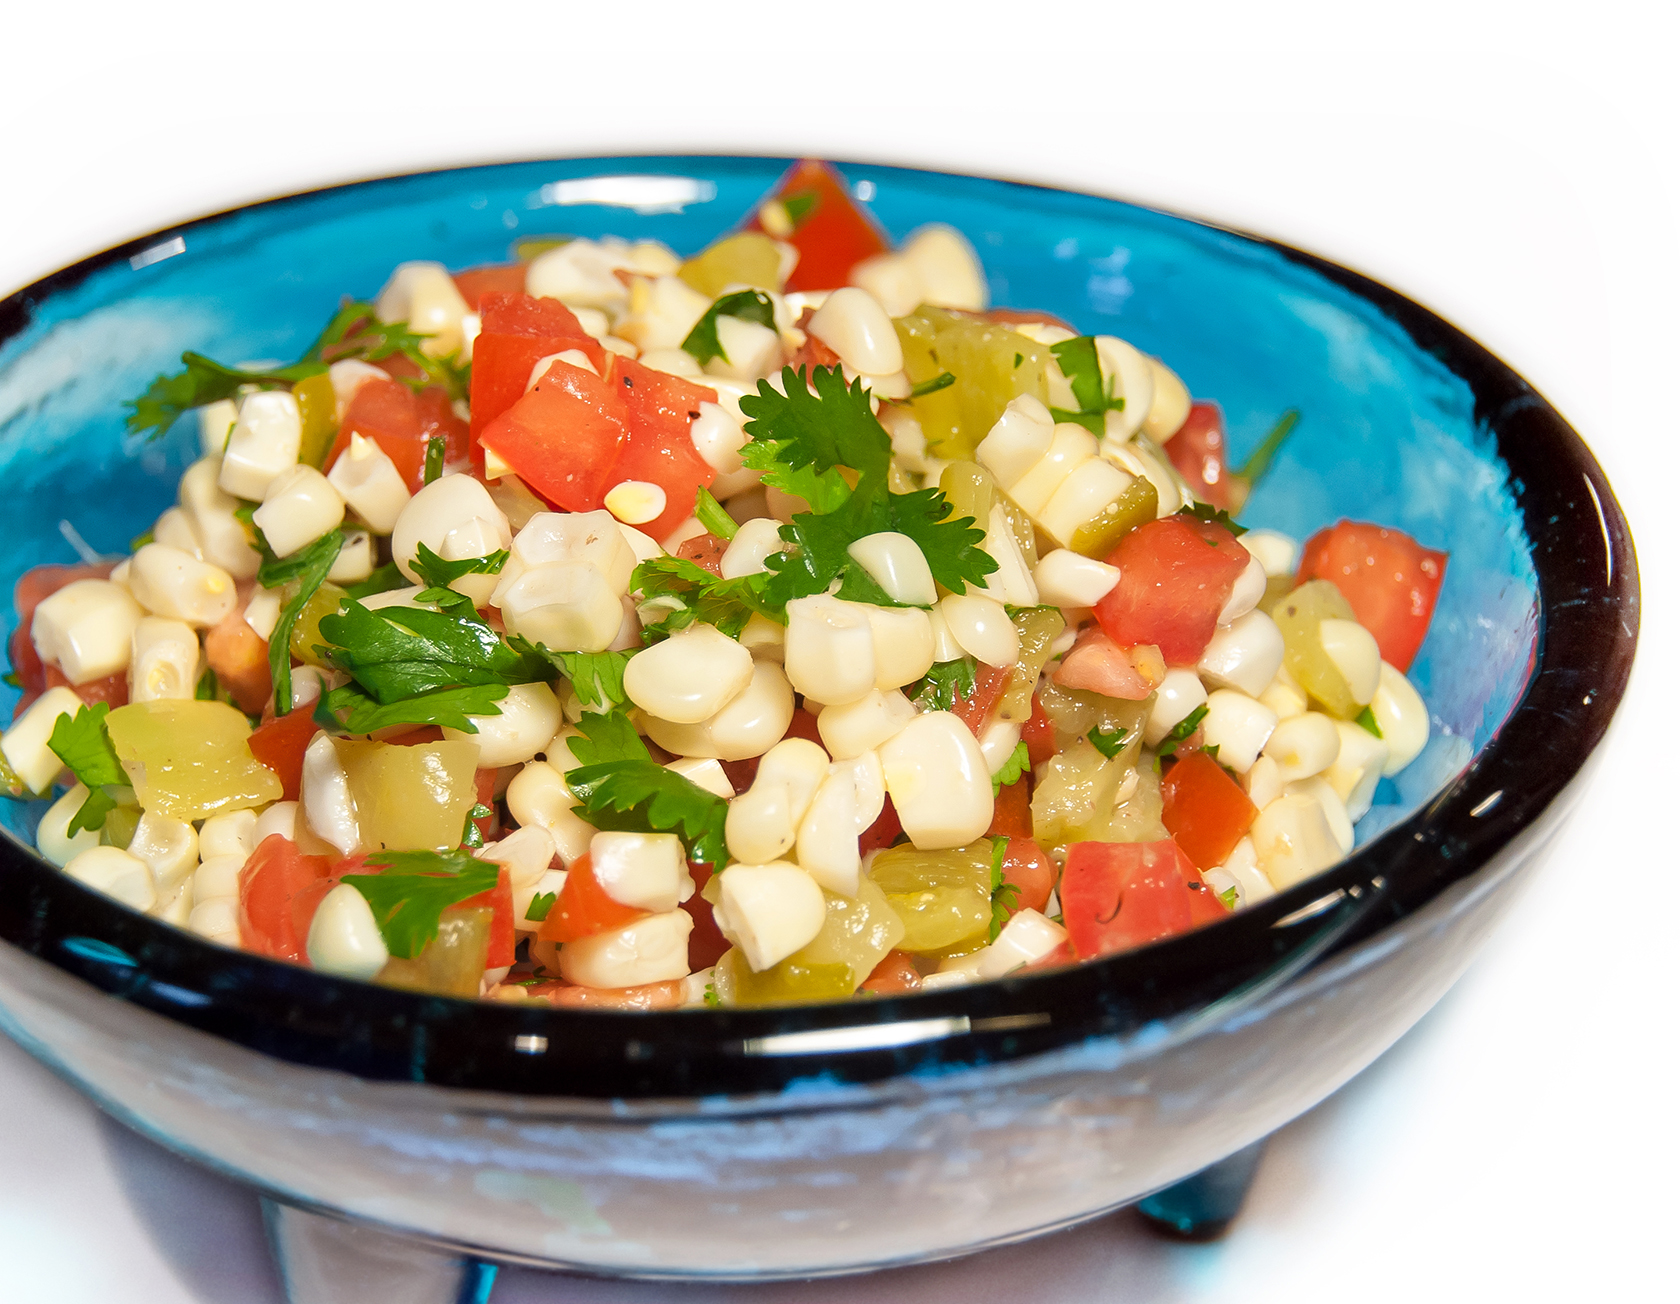
Last night I made my third batch of Roasted Corn Salsa in less than a month which can only mean two things…  One, this salsa is awesome and two, it’s high time it makes an appearance on the blog!!

Roasted Corn Relish 1

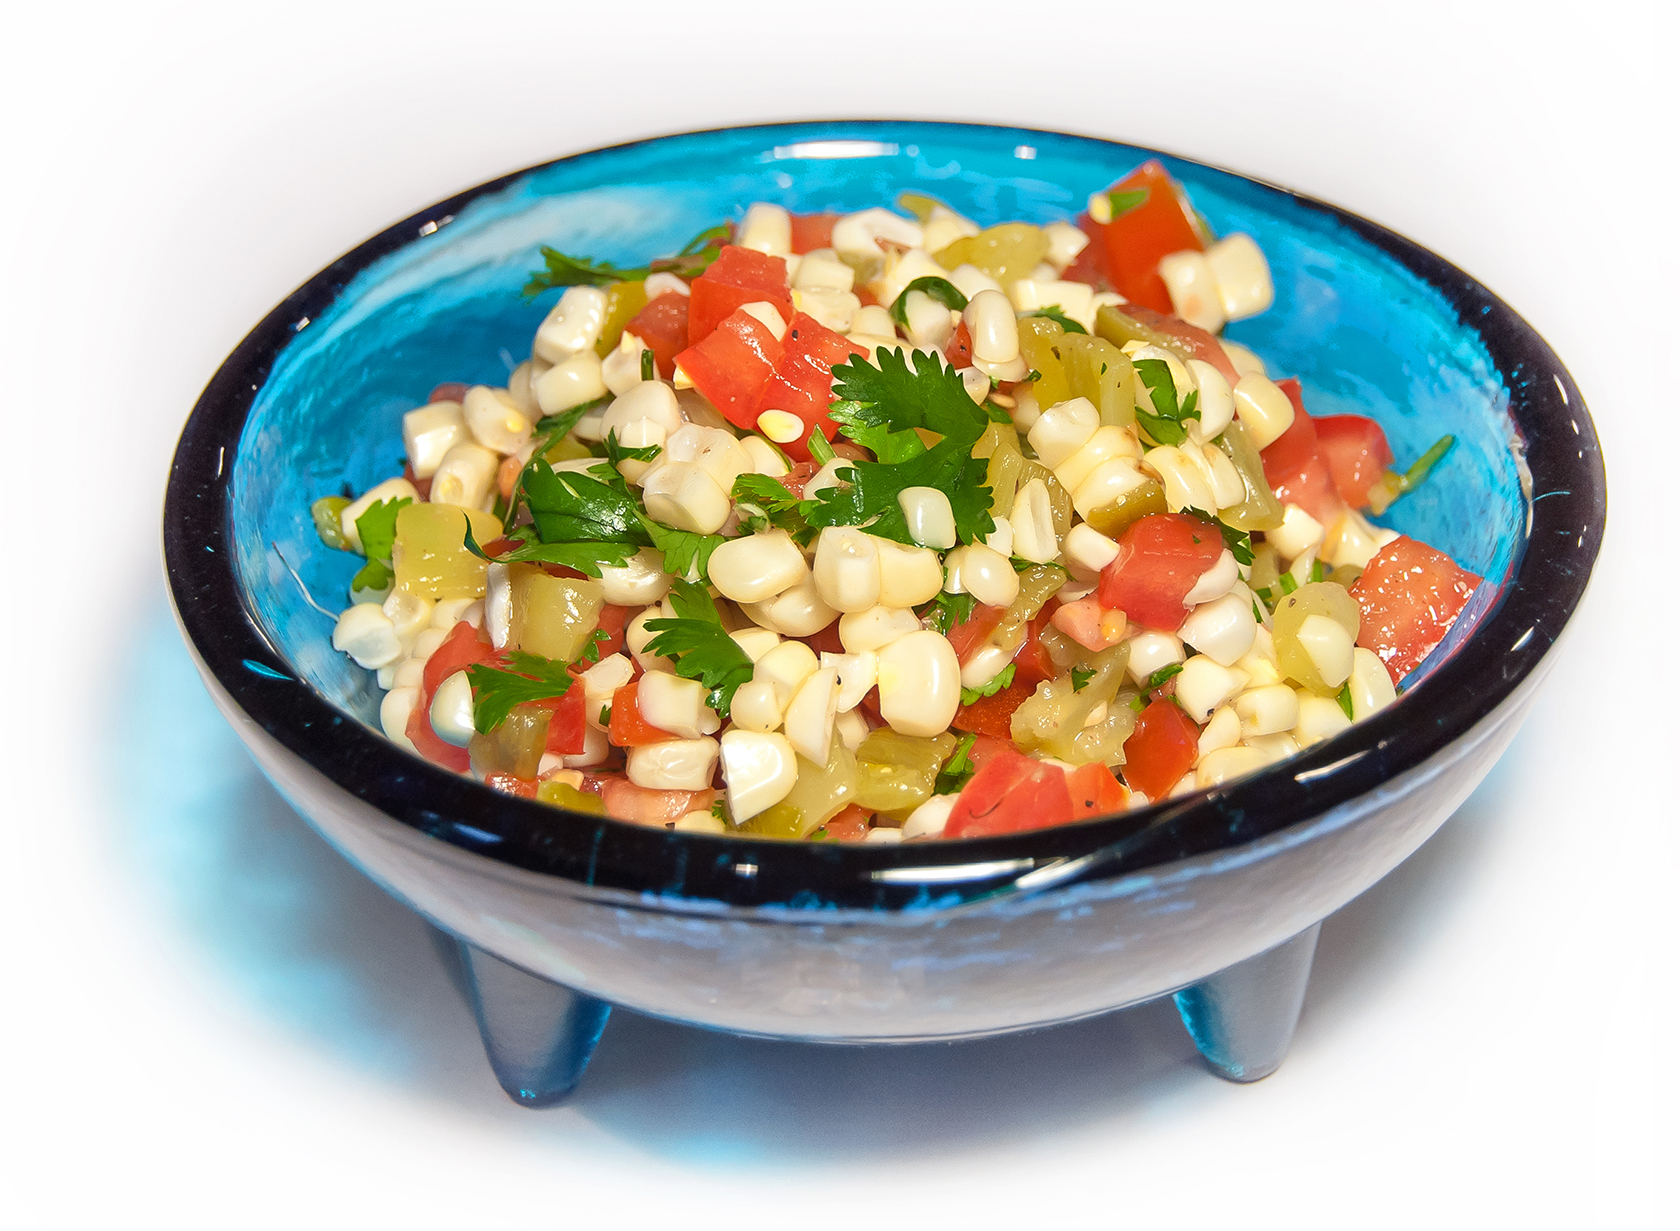
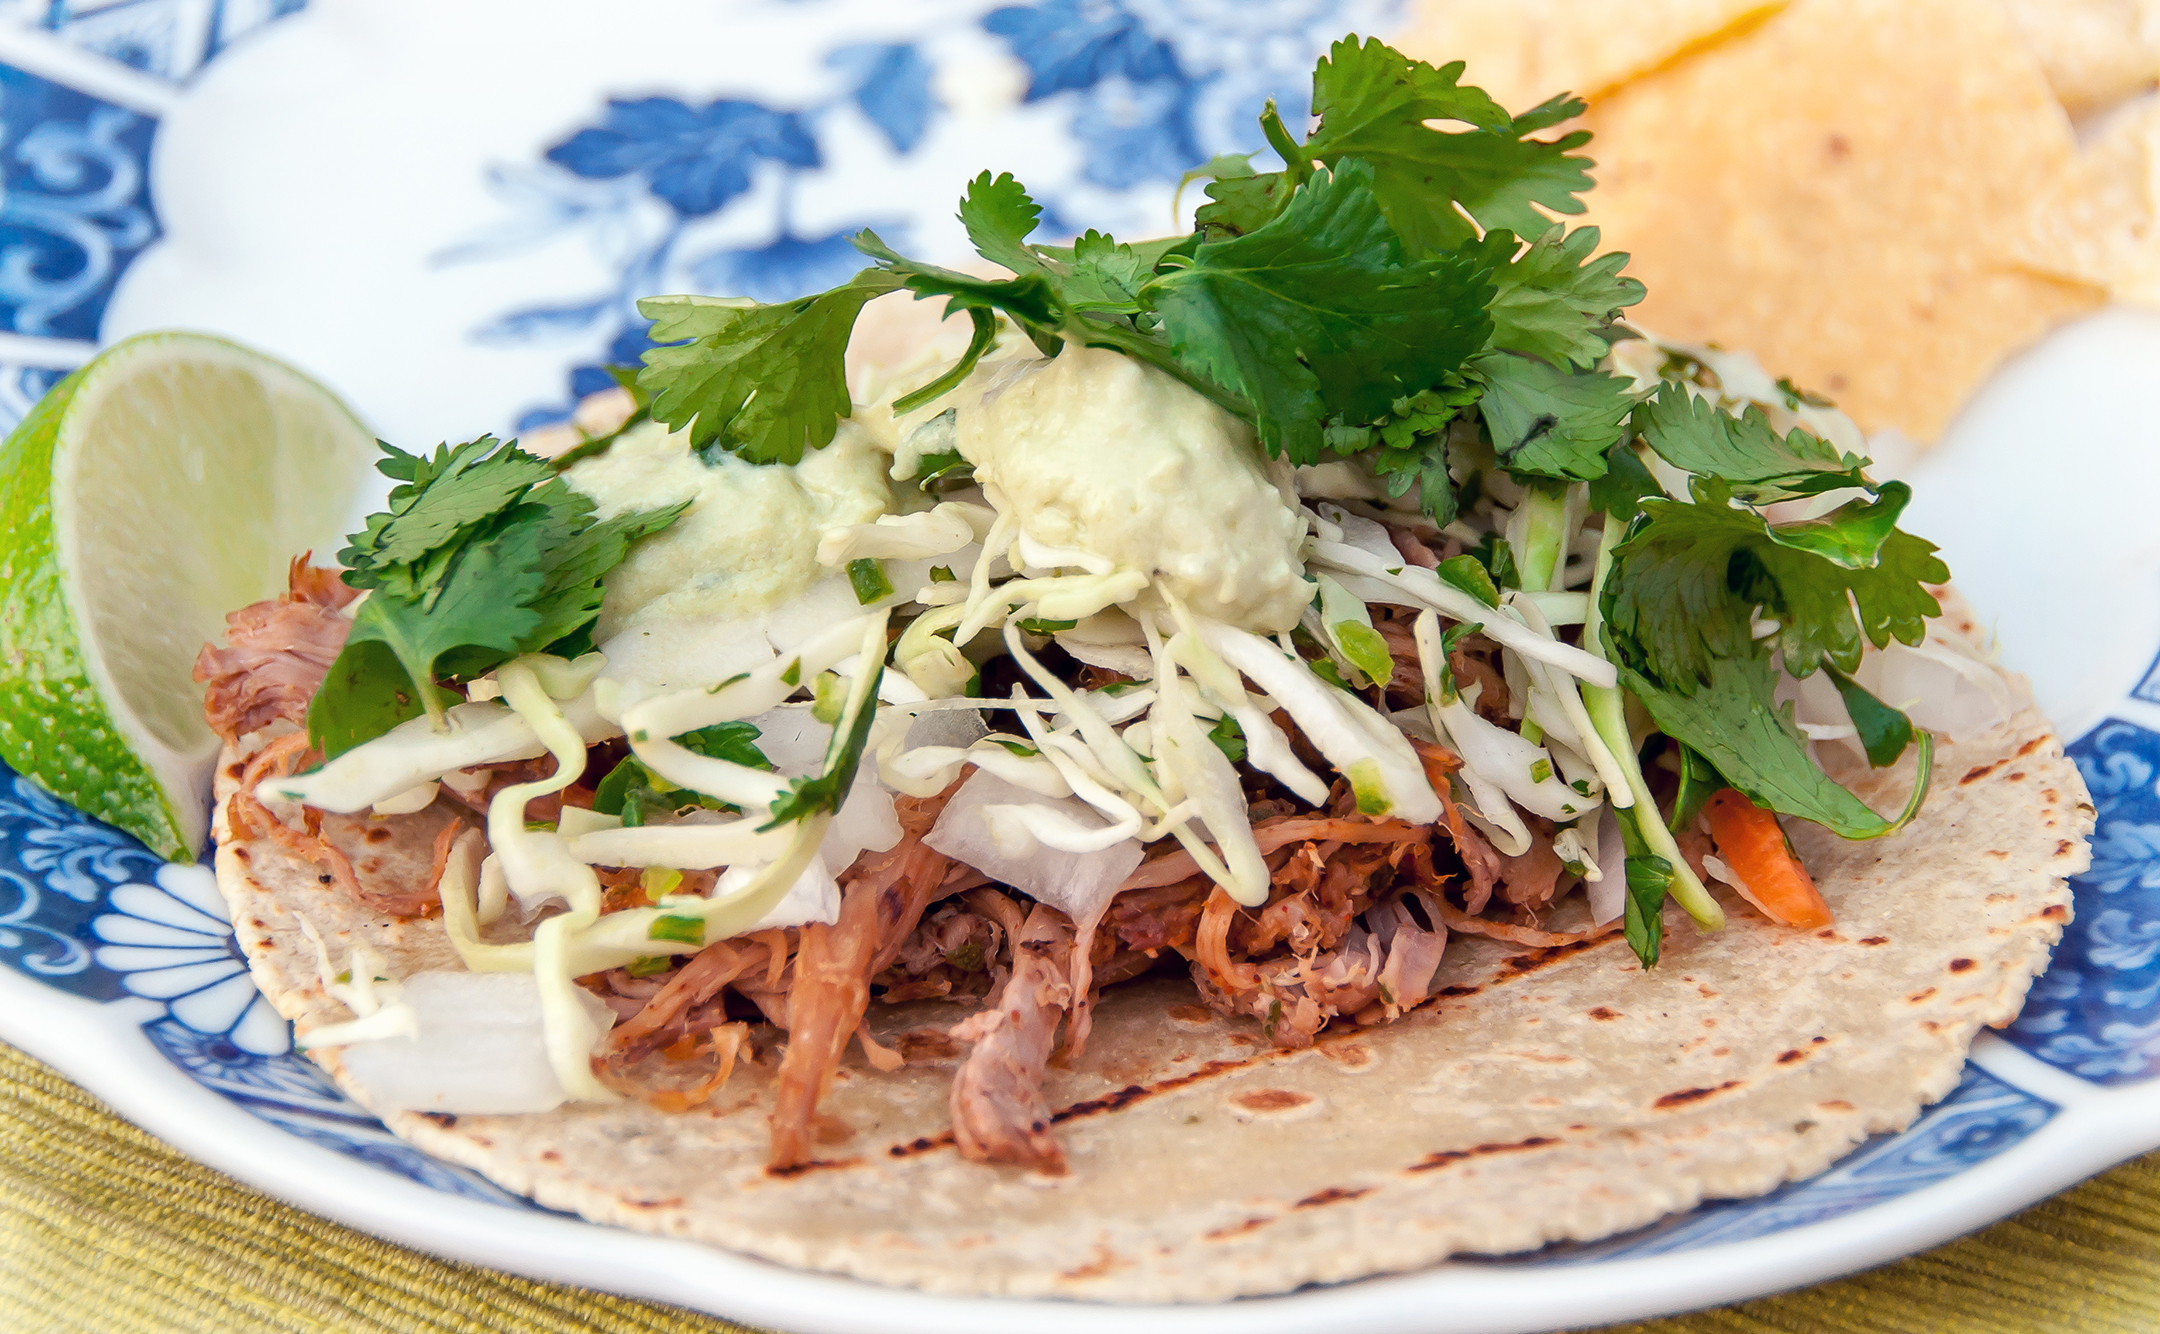
This bright, flavorful salsa features grilled corn, roasted peppers, fresh tomatoes, cilantro, and lime juice.  It pairs perfectly with grilled fish and grilled avocado (<– my new favorite way to eat avocados).  We’ve also tried the salsa on shrimp tacos and, although Matt thinks it’s a bit too lime-y for eating straight, I personally really enjoy eating it with tortilla chips.

Last night’s batch of salsa is being refrigerated until we have Matt’s parents over for dinner tomorrow night.  Making it ahead of time will save me prep time on Saturday and the extra hours in the fridge will allow the salsa flavors to fully combine.  I’ll post pictures of the final meal (grilled salmon!) next week.

Roasted Corn Relish 2

Roasted Corn Salsa  (adapted from MyRecipes.com; makes 6-8 servings) 

You will need…
Cooking Spray
4 ears Corn, husked
4 Anaheim Peppers or 4 Cubanelle Peppers (for less heat), or a combination of the 2 types
1 cup diced Tomatoes (from approx. 2-3 Roma Tomatoes)
6 tablespoons freshly squeezed Lime Juice (from approx. 3-4 limes)
1/4 cup chopped Cilantro
1/2 teaspoon Salt
1/4 teaspoon Ground Pepper

Directions:

Lightly coat the grates of a grill* set to medium heat with cooking spray.   Place the corn and peppers directly on the grill.  Allow the corn and peppers to cook, turning occasionally, until the corn kernels start to brown slightly and the peppers become soft and dark splotches start to form on the green skins.  Transfer the roasted corn to a plate to cool.  Place the roasted peppers in a large bowl and cover for 10-15 minutes.

Cut each corn ear in half, then place the flat end down on a cutting board and slice the kernels off of the cobs.  When the peppers are cool enough to handle, peel and discard the skins and remove the stems, seeds, and membranes.  Slice the peppers into 1/4″ pieces.

Combine the corn, peppers, tomatoes, lime juice, cilantro, salt and pepper in a large bowl.  Serve immediately or cover tightly and refrigerate up to 3 days to allow the flavors to intensify before serving.

Serving suggestions:

  • Serve over grilled salmon or another grilled fish (salmon recipe coming soon!)
  • Spoon over grilled avocado (slice avocado lengthwise & remove pit; brush grill with oil and place avocado halves directly on grates for 2-3 minutes until grill marks appear)
  • Serve as a fresh, citrus-y salsa with tortilla chips

Roasted Corn Relish 3

*If you don’t have a grill, use boiled corn on the cob or thawed frozen corn kernels.  The peppers can be roasted in an oven… here are some basic instructions on how to do this from Ina Garten.

Rotisserie Chicken Taquitos

Believe it or not, one of the most popular recipes on this blog is my take on Rotisserie Chicken Burritos.  I’m guessing it must be the combination of cheesy deliciousness and the ease of using precooked rotisserie chicken that makes the burritos so popular. (And did I mention the melted cheese? YUM!)  With that in mind, Matt and I set out to see what other easy weeknight meal we could make with rotisserie chicken.  These baked chicken and poblano chile taquitos are the satisfying result!

Rotisserie Chicken Taquitos

Taquitos are basically little burritos that are bite-sized and perfect for dipping.  Just like burritos, taquitos are created by wrapping a tortilla around tasty filling, but unlike burritos the taquitos are baked in the oven (or fried) to give them a nice crispy texture.  The firm outer shell of the tortilla helps each little taquito hold its shape as you dip it into your choice of salsa, sour cream or guacamole.

We made our taquitos rather plump which worked out well since they were our main dinner entree.  If you wanted to serve these as an appetizer you could make them a little thinner.  Also, we made up our filling as we went along and we’ll probably continue to tweak it when we make these in the future, so have fun and play around with your own combination of shredded meat, veggies, and seasonings.  Just don’t forget the cheese!  🙂

Homemade Taquitos Montage

Baked Rotisserie Chicken Taquitos with Poblano Chiles

You will need…
3 small Poblano Peppers
1/2 Yellow Onion, finely diced
1 clove Garlic, minced
1 large Rotisserie Chicken Breast, meat removed from bone and chopped
1 teaspoon Chile Powder
1/2 teaspoon Cumin
1/2 teaspoon Paprika
1/2 teaspoon Mexican Oregano
Salt and Pepper, to taste
Approx. 1 cup Shredded Mexican Blend Cheese
Handful Cilantro Leaves, roughly chopped
1/4 cup Peanut Oil
12-18 Small Corn Tortillas
Sour Cream and Salsa, for serving

Directions:
Place the poblano peppers on a rimmed baking sheet and broil on the top rack of an oven for 10-15 minutes, turning occasionally, until the pepper skin is blistered and starting to blackened.  Remove from the oven and transfer the peppers to a glass bowl.  Cover the bowl for 5-10 minutes with a dish towel to hold in the moisture.  Then, carefully peel the skin off of the poblanos (it should come off pretty easily), remove the seeds and finely chop.

Saute the diced onions and garlic in a non-stick pan over medium-high heat until translucent.  Add in the chopped poblanos, chicken and seasonings (chile powder through salt and pepper) and stir well.  Saute until ingredients are heated through then transfer to a large bowl.  Stir in the shredded cheese and cilantro to complete your taquito filling.

Heat the peanut oil in a small pan over medium heat.  Use tongs to place a tortilla in the oil.  The oil is hot enough when small bubbles appear around the outer edge of the tortilla.  (It’s too hot if the oil is bubbling wildly and/or causing the tortilla to lift up out of the oil.)  Allow the tortilla to heat in the oil for 20-30 seconds, then use the tongs to flip it over and cook for another 15 seconds.  Lift the tortilla out of the oil, allow the excess oil to drip off, then transfer to a cutting board.  Fill the tortilla with a small amount of the filling (approx. 2-3 tablespoons), roll it up, and place it seam-side down on a baking sheet.  Repeat this process with the remaining tortillas.

Bake the taquitos in a preheatead 350°F oven for 20-30 minutes or until the tops are golden brown.  Serve with sour cream and salsa.

Taquitos!

Pork Carnitas Tacos

Yesterday Matt and I had our Engagement Photo Session with our wonderful wedding photographer, Melissa Hassey. Prior to the shoot Melissa suggested that Matt and I just relax and do what we normally would be doing on a Tuesday afternoon so we embraced that advice and decided to cook a big meal. That’s pretty much a typical weeknight, after all!

Our “Engagement Session Meal” consisted of slow-cooked pork carnitas tacos with lots of yummy sides including jalapeño-lime slaw, avocado crema, and fresh cilantro. We also enjoyed a pitcher of mojito limeade and a few cold beers. Yum!

I can’t wait to see how Melissa’s photos turn out. She actually snapped some of me taking pictures of our food before dinner while Matt waited patiently for me to finish which, once again, is a pretty normal part of our daily life together!  (Update: You can view one of Melissa’s photos of me taking photos of our carnitas here.)

Slow-Cooked Pork Carnitas Tacos (serves 2 with LOTS of leftovers for 2-3 lunches each!)

For the Pork…
3 ½ – 4 lbs. Bone-In Pork Butt, fat mostly trimmed off and discarded
Salt and Pepper
3/4 cup Apple Cider Vinegar
1 1/2 teaspoons Cumin
1 teaspoon Chile Powder
1/4-1/2 teaspoon Cayenne Pepper
3 teaspoons Mexican Oregano

Corn Tortillas (approx. 3 per person)

Toppings/Sides…
Jalapeño-Lime Slaw
Avocado Crema
Chopped White or Yellow Onion
Fresh Cilantro
Guacamole
Rice (or, better yet, Cilantro-Lime Rice!)
Lime Wedges
Tortilla Chips

Directions:
Generously salt and pepper both sides of the pork butt and place the meat into a slow cooker. Pour the vinegar into the slow cooker, cover, and cook on high for 8-10 hours.

When pork is finished cooking, remove the pork from the slower cooker and transfer to a large bowl. Pull the pork apart with two forks (or your fingers!) and discard the bone. Stir in the cumin, chile powder, cayenne pepper and more salt and pepper — feel free to adjust the seasonings to taste. Spread the seasoned meat out on a large baking pan and broil in the oven for 5-6 minutes until the edges start to get crispy.

Pour the cooking liquid from the slow cooker into a large measuring cup and then return the broiled pork to the slow cooker. Mix in the oregano, then pour some of the cooking liquid into the slow cooker and stir until the pork absorbs it. Keep adding more liquid and stirring until the pork reaches your desired moisture level. (We skipped this step yesterday and thought that our pork was a little dry but we’ll definitely do it next time!) Discard any leftover liquid and keep the pork warm until you are ready to serve it.

Meanwhile, prepare your toppings and sides as per their respective recipes. Just before serving, heat up the corn tortillas to make them pliable and yummy. Either microwave them in a damp paper towel for approx. 30 seconds or have fun with the grill and grill the tortillas over indirect high heat for 2-3 minutes.

To assemble your pork carnitas taco layer the pork, slaw, crema, onion, and cilantro onto a tortilla and enjoy!

Pork Carnitas Taco

Pozole Verde

After (finally!) finishing our Thanksgiving leftovers Matt and I decided that we wanted to make a meal that featured tons of flavor, fresh veggies, and oh… NOT turkey! 🙂 We pulled out our trusty The New Best Recipe cookbook and found Pozole waiting for us in the stews chapter. Pozole is a traditional Mexican soup made with shredded pork and hominy (a type of corn) and it is DELICIOUS! We enjoyed our Pozole for dinner on Sunday and then happily ate it for lunch the next four days (and I’m still not tired of it!).

There are different types of Pozole including Rojo (made with chiles) and Blanco (made without any added sauces). This recipe is for Pozole Verde which includes a liberal amount of blended tomatillos, jalapeños, and cilantro. Make sure not to skimp on the garnishes – although Matt preferred the Pozole without any added flavors, I really enjoyed the freshness that the chopped onion, avocado, radish and tomato added to the finished dish!

Pozole Verde

Pozole Verde (Pork and Hominy Stew with Tomatillos, Cilantro and Jalapeño)
Serves 8-10; from Cook’s Illustrated – The New Best Recipe

Pozole Ingredients…
1 bone-in Pork Picnic Roast or Shoulder Roast, about 4-5 lbs.
Salt and Pepper
2 tablespoons Canola Oil
2 1/2 White Onions; 2 coarsely chopped, 1/2 quartered
5 cloves Garlic, minced
6 cups Low-Sodium Chicken Broth
1 pound Tomatillos, husked and quartered
3 Jalapeño Peppers, seeded and roughly chopped
1/2 cup Water
2 bunches (5 cups) Cilantro Leaves and Stems (thin parts)
3-15 oz. cans White or Yellow Hominy, drained and rinsed

Garnishes…
1/2 White Onion, finely chopped
1 Avocado, sliced
1 Jalapeño Pepper, finely chopped
6 Radishes, thinly sliced
1 Lime, sliced into wedges
8-10 Corn Tortillas, warmed and sliced into quarters or strips
1-2 Fresh Tomatoes, chopped
Tortilla Chips

Garnishes on Pozole Verde

Directions:
Trim excess fat off of the pork roast and cut along the muscle into several large pieces (approx. 8-9 pieces for a 4 lb. roast). Reserve the bones. Season the pork generously with salt and pepper. Heat the oil in a large (8 qt.) oven-proof dutch oven over medium heat. Add the 2 coarsely chopped onions and 1/2 teaspoon salt. Cook, stirring frequently, for approximately 4 minutes until the onions have softened and released moisture. Stir in the garlic and cook for 30 seconds.

Add the pork and bones to the onion mixture and stir frequently for approximately 8 minutes until the outside of the meat is no longer pink. Add the chicken broth and another 1/2 teaspoon salt and increase the heat to high. Bring the mixture to a simmer on the stove, then cover and cook in a preheated 300°F oven for 2 hours.

Meanwhile, place the tomatillos, jalapeños, water, and the quartered 1/2 onion in a blender. Blend for 2-3 minutes until smooth. Add the cilantro and blend for another 2 minutes. Set this brilliant green mixture aside.

Pozole Verde with Pork and White Hominy (pre-garnishes)

Pozole Verde with Pork and White Hominy (before we added garnishes)

After 2 hours, remove the dutch oven from the oven and return to the stove. Remove the pork and bones and place on a plate to cool. Stir the rinsed hominy into the broth mixture and bring to a simmer. Cook, covered, for 30 minutes to allow the flavors to meld.

Once the pork is cool, shred the pork with your fingers (or with two forks). Pull any remaining meat off of the bones and discard the bones. Stir the shredded meat and the green tomatillo mixture into the stew and simmer for approximately 10 minutes until the meat is hot. Serve in a large bowl with a liberal helping of the garnishes on top.

350 Pozole Verde

Liked this Pozole Verde recipe?  You may also enjoy my post on Pozole Rojo!

Chicken Enchiladas with Roasted Tomatillo Salsa

Several weeks ago I shared the recipe for one of our all-time favorite appetizers, Roasted Tomatillo Salsa. In addition to being a great appetizer, this salsa is also a star ingredient in Tyler Florence’s Chicken Enchiladas. We’ve made these enchiladas a few times and they are delicious! Although the original recipe calls for flour tortillas we tried mixing things up last night and used corn tortillas instead. The corn tortillas didn’t hold together quite as well as the flour tortillas (as evidenced by my disheveled-looking plated dinner photos!) but they more than made up for that with their wonderful corn-y texture and taste.

By themselves, these enchiladas will easily feed 4-6 adults for dinner but you could also serve them with Mexican rice or a side of beans to round out the meal.

Chicken Enchiladas with Roasted Tomatillo Salsa (from The Food Network)

You will need…
2 tablespoons Olive Oil
1/2 White Onion, diced
3 cloves Garlic, minced
1 1/2 teaspoons Cumin
1/4 cup Flour
2 cups Chicken Stock
Handful Cilantro Leaves, chopped, plus more for garnish
1 small Rotisserie Chicken, meat removed from bones and shredded
Salt and Pepper to taste
Approx. 2 cups Roasted Tomatillo Salsa (view recipe)
14 Corn Tortillas, warmed in a stack under a damp towel in the microwave for 30 seconds before assembly
8 oz. Monterey Jack Cheese, shredded
Sour Cream, for garnish
Tomatoes, Chopped, for garnish

Directions:
Heat the Olive Oil in a large skillet over medium high heat. Add the diced onion and sauté until the onion is starting to turn brown and caramelize, about 7 minutes. Add the garlic and cumin and continue to cook for 1 minute. Sprinkle in the flour, stir well, and gradually pour in the chicken stock. Stir well then reduce heat and allow to simmer until sauce thickens, stirring occasionally. Remove thickened sauce from heat and stir in 1 cup of the Tomatillo Salsa, along with the cilantro and shredded chicken. Stir well to combine. Taste and season with salt and pepper if desired.

Set up five stations with the following: (1) stack of warmed tortillas, (2) shallow bowl with several spoonfuls of tomatillo salsa, (3) chicken mixture, (4) Monterey Jack cheese, (5) 13×9 inch baking pan with several spoonfuls of tomatillo salsa smeared across the bottom. To assemble your enchiladas, coat both sides of a tortilla with salsa and spoon in a few tablespoons of the chicken mixture. Sprinkle some cheese over the chicken mixture and then roll the tortilla up and place in the baking pan. Repeat with the remaining tortillas, lining them up neatly in the baking pan. Spoon any extra chicken mixture over the rolled tortillas and cover with the remaining tomatillo salsa (approx. 3/4 cup). Sprinkle the remaining cheese on top and bake in a preheated 350° oven for 30 minutes.

The enchiladas are done when the cheese is melted and bubbly. Serve your enchiladas with a garnish of sour cream, cilantro, and chopped tomatoes. Enjoy!

Roasted Tomatillo Salsa

I’ve been wanting to share this recipe for Roasted Tomatillo Salsa for quite some time since it is one of our all-time favorite salsas.  It is a great go-to recipe for summer barbecues and picnics and features a fresh flavor, beautiful green color, and just the right amount of kick.  The original recipe came from The Food Network’s Tyler Florence and can be viewed here.

We first made this salsa last Spring when our oven was broken.  Instead of roasting the tomatillos, peppers, onion, and garlic in the oven, we wrapped the bottom of our 13×9 glass pan in foil and roasted the veggies on our grill over indirect medium-high heat.  If you find yourself wanting to make this recipe during a heat wave, using the grill might be a good way to avoid heating up your kitchen!

Tomatillos look sort of like green tomatoes with protective husks.

Roasted Tomatillo Salsa 

You will need…
10-12 Tomatillos, husked and sliced in half
4 cloves Garlic, peeled
2 Jalapeño Peppers, whole
1 White Onion, sliced into 6-8 large wedges
Juice from 1/2 to 1 Lime (depending on how juicy your lime is!)
1 teaspoon Salt
2 teaspoons Cumin
1/2 cup Cilantro, loosely chopped
Tortilla Chips

Directions:
Place the tomatillos, garlic, peppers, and onion in a 13×9 glass pan and roast in a preheated 400° oven for 20 minutes until veggies have softened.  Switch the oven to broil and broil for 4-5 minutes until black spots start to form on the tomatillos and peppers.  Remove from oven and set aside to cool.

Tomatillos, Garlic, Jalapeños (from my garden!), and Onion ready to be roasted.

Meanwhile, place the lime juice, salt, cumin and cilantro in a blender.  When the tomatillo mixture is cool enough to handle safely, pour the roasted veggies and any accumulated juices into the blender.  Blend the mixture until it is fairly uniform (or to your desired salsa consistency) and serve with tortilla chips.

Fire-Roasted Tomato Salsa

Although Matt and I certainly don’t need an excuse to make a Mexican-themed meal, the fact that yesterday was Cinco de Mayo inspired us to choose two new recipes from our Mexican Everyday cookbook.  Mexican Everyday was written by Rick Bayless (the chef behind Frontera Foods) and I love that Rick included a whole intro section that describes the use and preparation of various Mexican ingredients including chipotles en adobo, jicama, tomatillos, and queso fresco (all ingredients that I had never worked with before buying this book!).

For our Cinco de Mayo feast we snacked on chips and Fire-Roasted Tomato Salsa as we prepared dinner and then enjoyed Smoky Pork Tinga Tacos with Avocado and Quesco Fresco as our main dish.  We also shook up a batch of delicious Margaritas on the Rocks using lime juice, tequila, triple sec, and simple syrup.  This post will cover our  salsa… more on the tacos coming up next!  🙂

Fire-Roasted Tomato Salsa (from Mexican Everyday)

You will need…
2 Jalapeño Peppers
3 cloves Garlic, unpeeled
1 – 15oz. can Fire-Roasted Diced Tomatoes, undrained
1/3 cup While Onion, finely chopped, rinsed, and drained
1/3 cup loosely packed Cilantro, chopped
1 teaspoon Fresh Lime Juice
Salt, to taste

Directions:
Place the jalapeño peppers on a grill over direct medium-high heat.  Allow the peppers to roast for approximately 10 minutes, turning occasionally, until the skin becomes dark and splotchy in spots.  At the same time, heat a small skillet over medium heat and lay the unpeeled garlic cloves in the skillet.  Allow the garlic to roast for approximately 15 minutes until dark and splotchy in spots.

Dry-roast the Jalapeños until the skin becomes blotchy and blackened.

Pull the stems out of the roasted peppers and remove the garlic cloves from their skin.  Place the roasted ingredients in a food processor and pulse until finely chopped.  Add the tomatoes with their juice and pulse a few more times until the mixture reaches your desired consistency.  Pour the tomato mixture into a medium bowl.  Add the onion and cilantro and mix well.  Taste and season with lime juice and salt.  Enjoy with corn tortilla chips and a nice cold margarita.  🙂

Corn and Black Bean Salad

This healthy, colorful salad is easy to make and the combination of rice vinegar, lime juice and cilantro give it a great, fresh flavor.  Because you can make it several hours ahead of time, this has been a go-to side dish for us when we’re having people over for dinner.  The leftovers (if there are any!) keep well and are delicious either alone or as a chunky salsa/dip with tortilla chips.  We found the original recipe on Whole Food’s blog.

Corn and Black Bean Salad

You will need…
2 – 15 oz. cans of Black Beans, drained and rinsed
15 oz. frozen Corn, rinsed (if using canned corn boil it for 1 minute and then drain)
1 small Red Onion, chopped and rinsed
1 Red Bell Pepper, chopped
2 tablespoons Rice Vinegar
1 tablespoon Extra Virgin Olive Oil
1 tablespoon Lime Juice
1/4 teaspoon Salt
1/2 teaspoon Ground Black Pepper
1/3 cup Cilantro, chopped

Directions:
Rinse the beans, corn and red onion in a large colander.  Allow to drain thoroughly, then add the red bell pepper.

Meanwhile, combine the rice vinegar, olive oil, lime juice, salt, and pepper in a large bowl.  Mix well, then add the bean, corn, onion, and pepper mixture from the colander.  Add the chopped cilantro.  Mix the entire salad well and then cover and place in the refrigerator for at least 1 hour to chill.  Stir again before serving.

Sausage-Corn Scramble with Home Fries

This past weekend we had some of the best April weather I can remember.  Matt and I took advantage of the sunny, 70 degree temperatures by spending what seemed like the entire weekend outside.  We reseeded our lawn (Bailey’s sliding tennis ball grabs and tight turns take their toll on the grass!) and I planted moonflowers, morning glory, mint, marjoram, chives, marigolds, zinnias and dahlias.  We also enjoyed a 4 ½ mile hike in the Woodlawn Trustees Wildlife Refuge in Northern Delaware (I’ll post more about that later) and still managed to find some time to sit back and enjoy the wonderful fragrance of our blooming viburnum bushes, crab apple trees, and cherry trees.

Of course all of that outside time made us hungry so we also spent a good portion of the weekend cooking delicious meals.  Saturday night we made decadent Bucatini with Homemade Meatballs and Tomato Sauce, Sunday morning we feasted on a Sausage-Corn Scramble and crispy, browned Home Fries, and Sunday evening we had Matt’s parents and his brother over to share our Adobo-Lime Chicken with Corn and Black Bean Salad and Spanish Rice.  Yum!  Throughout the week I will post recipes for all of these meals but for now I’ll start with our Sunday morning scramble with home fries.

For the scramble, we chose to go with a Mexican flavor since we had some leftover “corn con salsa” (sautéed corn with some black bean salsa and cilantro) that we wanted to use up.  We just had normal pork sausage, but this recipe would be GREAT with chorizo instead.  (Maybe next Sunday!)  I also threw in some baby spinach from my garden since my spinach plants are just getting to the point where they need to be thinned.  These spinach shoots gave the scramble a nice bit of color and flavor.

Baby Spinach, freshly thinned from our garden

For our home fries we followed the recipe from our Cook’s Illustrated The New Best Recipe book.  The potatoes were buttery, crisp, and salty… the perfect combination!

Sausage-Corn Scramble with Home Fries

Ingredients:

For the Home Fries
2 Russet Potatoes, cut into ½” cubes
2 ½ tablespoons Peanut Oil
1 Medium Red Onion, chopped
Salt & Pepper to taste
1 teaspoon Paprika
2 tablespoons butter

For the Scramble
2 tablespoons Olive Oil
1 large Shallot, thinly sliced
¼ pound Ground Pork Sausage (or Chorizo)
¾ cup Leftover Corn Con Salsa (sautéed corn with salsa and cilantro); or any similar type of black bean or corn salad or salsa that you enjoy)
½ cup Baby Spinach (I used “infant” spinach shoots freshly thinned from the garden)
5 Eggs, whisked together in a large bowl
1/3 cup Monterey Jack Cheese, shredded
Salt & Pepper to taste
Garnish of Salsa and Cilantro

Directions:

Place the cubed potatoes in a small pot, cover with ½” of water and add 1 teaspoon salt.  Heat the pot on the stove over high heat just until the water starts to boil, then remove from heat and drain the potatoes in a colander.

Heat the peanut oil in a heavy-bottomed skillet over medium-high heat.  Add the red onion and sauté until browned.  Remove the onion from the pan and place in a small bowl with the salt, pepper, and paprika.

Add the butter to the heavy-bottomed pan that you sautéed the onion in and allow it to melt.  Add the potatoes and shake the pan so that the potatoes lay evenly on the bottom of the pan in one layer.  Allow the potatoes to cook for 4 to 5 minutes without stirring; this will ensure that they get nice and crispy on that side.  After 4 to 5 minutes, stir the potatoes to flip them over and allow them to cook for another 4 to 5 minutes.  Repeat this process a few times until the potatoes are evenly browned on all sides.

Add the onion mixture to your potatoes and mix thoroughly.  Taste a potato (yum!) and add extra salt and pepper if needed.  Leave the potatoes in the pan to keep them nice and hot until you are ready to serve them.

For the scramble, heat up the olive oil in a large frying pan and add the shallots.  Saute the shallots for a few minutes, then add the sausage.  Use a spatula to flatten the sausage in one layer across the bottom of the pan and allow it to cook for 2-3 minutes without stirring.  (As was the case with the potatoes, this will allow the sausage to brown and get a little crispy.)  Flip the sausage over and allow the other side to brown as well.

After sausage is evenly browned and slightly crispy, break up the sausage with your spatula.  Mix in the corn mixture and baby spinach and cook for another 1-2 minutes, stirring occasionally.

Corn 'con salsa' and baby spinach for the scramble

Stir the Monterey Jack cheese, salt and pepper into the egg bowl and then add to your sausage mixture in the frying pan.  Stir and flip the mixture regularly for 4-5 minutes until eggs reach your desired level of doneness.

Garnish the scramble with a dollop of salsa and a sprig of cilantro and serve with your crispy home fries and a cup of coffee.

Southwestern Turkey Burgers

After making our delicious Guacamole-Chipotle Burgers on Wednesday, we had a few leftovers, namely chipotle mayonnaise, guacamole, poblano pepper, cheese, and buns (everything but the burger!).  We decided to put our toppings to good use and try out the Guacamole-Chipotle Burger recipe using ground turkey instead.

We followed the same basic recipe as the beef burgers with a few exceptions.  We were worried that the lower fat content of the turkey would produce dense, dry burgers so we chopped up the pepper jack cheese and mixed it plus a little shredded Monterey Jack directly into the turkey mixture.  We also added slightly less pepper (just under 1/2 teaspoon per pound of meat) and Matt grilled the burgers longer — approximately 5 minutes per side over direct high heat — to make sure they were cooked through.

The turkey burgers turned out nice and juicy thanks to all of the cheese and the overall combination of turkey, chipotle mayo, poblano, cilantro, and guacamole was delicious!  Next time we make fancy beef burgers we’ll definitely plan to make the healthier turkey equivalent with the leftovers.  🙂