Mexican Pizza

I love pizza and I LOVE nachos so tonight I decided to combine these two culinary delights into one delicious meal: Mexican Pizza!  I made up the recipe as I went along and, after sinking his teeth into the first sausage-y, cheesy, tomato-y bite, Matt declared that this pizza was my best-ever made up recipe of all time!

Mexican Pizza!

The ingredients are simple: pizza dough, cheese, and your favorite nacho or taco toppings.  I used fire-roasted corn, beans, red onions, green onions, jalapeños (from our garden), cherry tomatoes (also from the garden!), and sausage that was crumbled and cooked with a bit of taco seasoning.  The sausage that we had on hand was actually bratwurst which obviously isn’t the most Mexican of sausages but it ended up tasting just fine.  If I was going to plan for making this again I’d try some nice fresh chorizo sausage instead.  Yum!

Mexican Pizza

Annie’s Mexican Pizzaa The Little GSP original!

You will need…
1/4-1/2 cup Corn (I used frozen corn)
1-2 Jalapeño Peppers, sliced into thin rounds
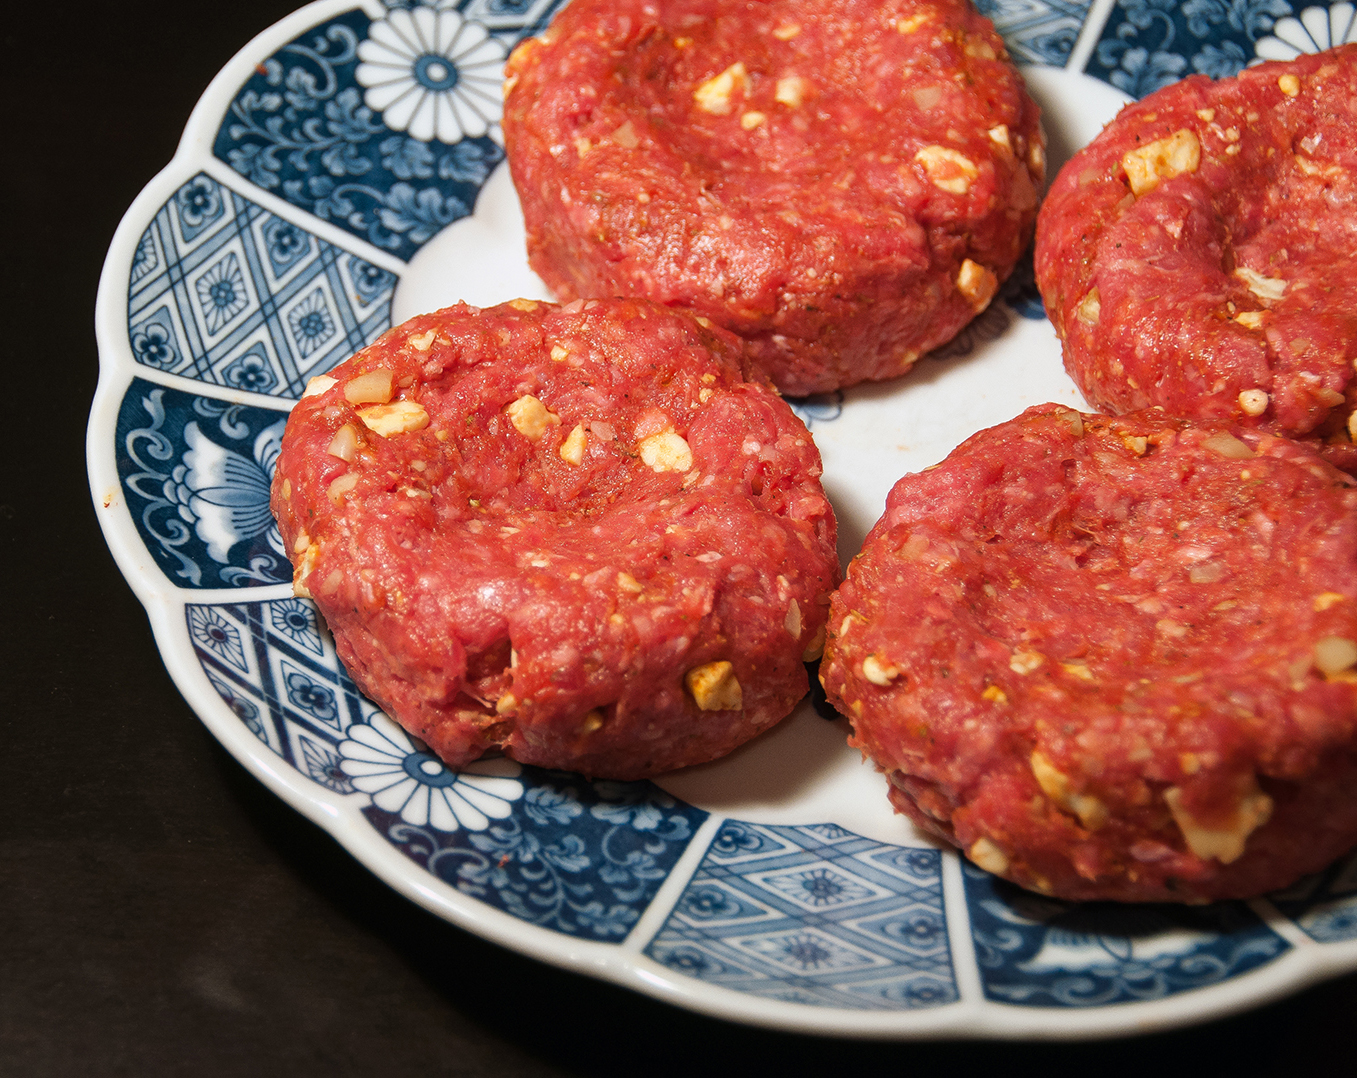
2 Fresh Sausages, casings removed and roughly chopped/crumbled (I’d recommend Chorizo or Italian Sausage)
1-2 teaspoons Taco Seasoning (optional; good if you’re using a mild sausage like bratwurst!)
1 package fresh Pizza Dough
1/4 cup Red Onion, finely chopped
1/4 cup Black Beans, rinsed and drained (about a quarter of a 15 oz. can)
8-10 Cherry Tomatoes, halfed
2-3 handfuls shredded Mozzarella
1-2 handfuls shredded Mexican Cheese Blend
Sliced Green Onions, to garnish
Cholula Hot Sauce, to taste
Sour Cream, to taste

Directions:
Heat a skillet (I used my wok) over medium high heat and add the frozen corn.  Allow the corn to thaw and then dry roast in the pan for approx. 10 minutes, stirring occasionally, until the corn is starting to blacken slightly.  Transfer the roasted corn to a bowl and set aside.  Put the sliced jalapeños into the hot skillet and roast for 10 minutes, stirring occasionally, until the pepper slices start to soften.  Transfer the jalapeños to a bowl and set aside.

Add the crumbled sausage to the hot skillet and spread it out in one layer on the bottom of the pan.  Allow to brown for 2-3 minutes, then stir the sausage frequently until browned and fully cooked.  If using a mild sausage (or if you want an extra kick), stir in the taco seasoning.  Transfer the cooked sausage to a paper towel-lined plate and set aside.

Preheat the oven to 500°F and, if you’re using one, allow your pizza stone to heat up in the oven.  Prep the pizza dough according to the package instructions.  I used a package of fresh Trader Joe’s pizza dough and made a 12-14″ pizza on our new pizza peel.  I used flour to keep the pizza from sticking to my hands and stretched it out in all directions without over-handling it.  If you are making two pizzas and/or don’t have a peel, just split up the dough and shape it to fit on a greased cookie sheet.  (For more information on how I stretch pizza dough, check out my Homemade TBM Pizza recipe.)

Uncooked Mexican Pizza

Now here’s the fun part… building your Mexican pizza!  I started with a sparse sprinkling of red onion followed by a bit of Mozzarella, a scattering of black beans and a generous helping of roasted corn.  Then I added a thin, even layer of Mozzarella over the whole pizza before spreading all of the crumbled sausage onto the pie.  After a final sprinkling of Mozzarella I added on the cherry tomatoes, jalapeños, and a few more bits of red onion.  Finally, I topped off the pizza with a little shredded Mexican Cheese Blend to give it some nice color.

Bake your Mexican Pizza in the 500°F oven for 10-12 minutes or until the crust is puffed and fully cooked.  If using a pizza stone, you’ll have to transfer the uncooked pizza from the pizza peel onto the hot stone in the oven (a skill that we’re still working on!) and then slide the fully cooked pizza back on the peel to be cut.  Sprinkle the chopped green onion over the top of the pizza, slice the pizza, and serve with hot sauce and sour cream.  Enjoy!

516 Mexican Pizza

Mediterranean Lamb Burgers

A few weeks ago we went grocery shopping with the intention of buying ingredients for our Guacamole-Chipotle Burgers but when we arrived at the meat aisle we discovered that our supermarket was having a sale on ground lamb.  We quickly abandoned our beef burger plans and instead decided to tackle a new recipe using the lamb.  After some quick iPhone-aided recipe searches we settled on Mediterranean lamb burgers with a spicy mayo sauce and a cucumber-mint topping.  Without further ado, here’s the recipe!

Lamb Burger

Mediterranean Lamb Burgers with Harissa Mayo and Cucumber-Mint Sauce

For the Harissa Mayo: (recipe from Chow.com)
1/4 cup Harissa*
1/2 cup Mayonnaise

For the Cucumber-Mint Sauce: (recipe from AllRecipes.com)
1/2 large Cucumber, peeled, grated and squeezed dry
3/4 cup Sour Cream
1 tablespoon Mint, choppedHomemade Harissa
1 teaspoon Red Wine Vinegar
1 clove Garlic, minced
Salt and Pepper, to taste

For the Burgers:
1 1/2 pounds Ground Lamb
1 tablespoon Harissa*
1/4 cup Feta, crumbled
1 teaspoon Salt
1/4 teaspoon Pepper
5-6 Hamburger Buns, cut in half lengthwise and lightly toasted

*Harissa is a Tunisian chile paste that can be purchased in tubes or cans in a good grocery store.  We couldn’t find Harissa in our local store so we used this Harissa recipe from Whole Foods to make our own.

Directions:

Start by making your condiments.  Make the Harissa Mayo by stirring together the Harissa and mayonnaise in a small bowl.  Make the Cucumber-Mint Sauce by mixing all of the ingredients together in a larger bowl and adding salt and pepper to taste.  Cover and refrigerate both sauces until you are ready to assemble your burgers.

Raw Lamb BurgersMake the Lamb Burgers by placing the ground lamb in a shallow bowl and spreading it out slightly.  Add in the Harissa and sprinkle the feta, salt and pepper evenly over the surface of the meat.  Carefully mix the ingredients into the meat with your hands.  (Avoid over-mixing the meat as this will make your burgers tough!)  Split the meat mixture into 5-6 loose balls (about 1/4 pound each).

Place the lamb “balls” on a plate and press down gently to flatten them slightly.  Form a small indent (about 1/4″ deep) in the center of one side of each patty.  Place the lamb patties, indent side up, on a preheated, oiled grill over direct high heat.  Close the lid and allow to cook for 6-7 minutes, then flip the burgers and let them cook for another 6 minutes.  Remove the burgers from the grill and let them rest, covered, on a plate for 4-5 minutes.

To assemble your burger, slather a liberal amount of the Harissa mayo on the bottom of the toasted burger bun.  Place the cooked lamb patty in the bun and top with a heaping spoonful of the cucumber-mint sauce.  Enjoy!

Lamb Burger

Chicken Lo Mein

This past weekend was our first free weekend since before our wedding! No DockDogs events, no traveling, no commitments… just time to ourselves! We celebrated by sleeping in both days, going out to lunch together (because we slept through breakfast) and watching hours of the British Open and Tour de France. I also did a lot of running on our brand new treadmill and Matt started a construction project that involved cutting open our bedroom wall in multiple spots… more on those events in a future post!

For dinner on Saturday we made a new recipe from our trusty cookbook, Stir Frying to the Sky’s Edge. I know I’ve said this before but this cookbook is AWESOME! In addition to savory recipes like Kung Pao Chicken and Hot Pepper Beef, this book is also full of helpful cooking techniques, information about ingredients and a whole tutorial on how to select and care for your wok. We have always been amazed by how great the recipes from this book turn out and Saturday’s dinner of Chicken Lo Mein was no exception. Without further ado, here’s the recipe!

Chicken Lo Mein

Chicken Lo Mein with Ginger Mushrooms (from Stir Frying to the Sky’s Edge by Grace Young)

You will need…
12 oz. fresh thick Egg Noodles*
2 teaspoons Sesame Oil
12 oz. boneless, skinless Chicken Thighs, cut into 1/4″ thick bite-sized slices
1 tablespoon Ginger, finely shredded (cut into tiny matchstick-like pieces)
1 teaspoon plus 1 tablespoon Rice Wine or Dry Sherry, divided
1 teaspoon Cornstarch
1 teaspoon plus 1 tablespoon Soy Sauce, divided
1 teaspoon Salt, divided
1/4 teaspoon Ground White Pepper
2 tablespoons Peanut Oil, divided
1/4 teaspoon Red Pepper Flakes
3 cups Napa Cabbage, thinly sliced
4 oz. Shiitake Mushrooms, stems removed and caps thinly sliced
1/2 cup Scallions, finely shredded (try using a Negi cutter to shred the scallion into even threads)
*We couldn’t find egg noodles so we used a package of Kame Stir-Fry Hokkien Noodles that we simply microwaved to heat up.

Directions:
Cook or heat up your noodles until al dente according to the package instructions. If using fresh noodles that you have to cook in boiling water, drain the cooked noodles and rinse several times with cold water. Place the cooked noodles in a bowl and stir in the sesame oil. Set aside.

Combine the chicken, ginger, 1 teaspoon rice wine, cornstarch, 1 teaspoon soy sauce, 1/4 teaspoon salt and the white pepper in a small bowl. In another small bowl combine the remaining 1 tablespoon rice wine and 1 tablespoon soy sauce.

Heat a wok over high heat. Pour in 1 tablespoon of the peanut oil and add the red pepper flakes. Stir fry for 10 seconds then push the flakes to the sides of the wok and add the chicken mixture. Spread the chicken evenly on the bottom of the wok and allow to cook, undisturbed, for 1 minute, then stir fry the chicken for another 30 seconds or until it starts to brown. Add in the cabbage and mushrooms and stir fry for 1 minute or until the cabbage wilts. Transfer the wok contents to a plate.

Pour the remaining tablespoon of peanut oil into the wok then add in the noodles and stir fry for 15 seconds. Stir in the rice wine/soy sauce mixture and add the scallions, chicken mixture, and remaining 3/4 teaspoon salt. Stir fry for 1 to 2 minutes or until the chicken is cooked through. Serve and enjoy!

Chicken Lo Mein Close Up

Chicken Lo Mein Dinner

Vietnamese Banh Mi Steak Sandwiches

It’s hot out!!  We’re in the midst of a heat wave here in southeastern Pennsylvania and as of today the high humidity and 90°+ daytime temps are supposed to last until the weekend.  This unrelenting heat makes us feel like eating fresh, light meals like the Vietnamese Banh Mi steak sandwiches that we made a few nights ago.  The three primary elements of these sandwiches – cool pickled vegetables, grilled steak with an amazing citrus-y marinade, and a spicy Siracha mayo – offer the perfect amount of crunch, flavor, and heat, and the end result is an absolutely delicious steak sandwich with a definite Asian flair.  YUM!

Banh Mi Sandwich Close Up

If you’re planning on making this recipe, leave at least 30 minutes to marinade the steak and allow the matchstick-sliced carrots and daikon radishes to pickle.  We had trouble finding a daikon radish (we should have just gone to the produce market rather than a big grocery store!) so we used standard red radishes.  To slice our carrots into nice, uniform matchsticks we used a kinpira (aka julienne cutter).  The round red radishes were harder to slice with the handheld kinpira so we ended up using the matchstick blade on our mandoline which worked well.

Vietnamese Banh Mi Steak Sandwich

For the Steak…  (Marinade recipe from NYT’s Diner’s Journal)
1/2 cup Fish Sauce
1 tablespoon packed Lime Zest
1/3 cup Lime Juice (from 3 limes)
2 tablespoons Dark Brown Sugar
2 cloves Garlic, minced
1 Jalapeño Pepper, minced (seeds and veins removed)
1 1/2 – 2 lbs. Flank Steak (you’ll have some extra steak left over; we ate it another night for dinner)

For the Do Chua Pickled Carrots and Radishes… (Recipe from A Lovin’ Forkful)
1/2 cup Water
1/4 cup Rice Vinegar
1 tablespoon Sugar
1/4 teaspoons Salt
1/8 teaspoon Red Pepper Flakes
1/2 cup Matchstick-sliced Carrots
1/2 cup Matchstick-sliced Daikon Radish (we couldn’t find daikon on short notice so used regular radishes)

For the Sriracha Mayo… (also from A Lovin’ Forkful)
4 tablespoons Mayonnaise
1 1/2 teaspoons Sriracha
(Just use roughly an 8:1 ratio… adjust to taste!)

Other Ingredients…
1 English Cucumber, thinly sliced
2 Soft Baguettes or Sandwich Rolls, sliced in half lengthwise
Cilantro, to garnish

Banh Mi close up

Directions:
The steak needs to marinade so start this part of recipe ahead of time.  To make the marinade, combine the first six ingredients (fish sauce thru jalapeño) in a bowl.  Place your flank steak in a large resealable bag and pour the marinade over and around the steak.  Seal the bag, turn it to coat the steak evenly, then allow the steak to marinade for at least 30 minutes (up to overnight) before cooking.

The pickled carrots and radishes also need some time to soak in their flavors so make these ahead of time, too.  Combine the pickling ingredients (water thru red pepper flakes) in a small saucepan and bring to a simmer, stirring occasionally.  Place the carrots and radishes in a bowl and pour the liquid over the vegetables.  Stir well to coat the veggies and arrange them so they are submerged in the liquid, then cover and refrigerate for at least 30 minutes or ideally overnight.

When you are ready to make your meal take the steak out of the fridge and allow it to warm up to room temperature.  Pat both sides of the steak dry with paper towels,  then grill the steak over direct high heat, flipping once, until it reaches your desired level of doneness.  (Our cut of steak took about 5 minutes per side for medium/medium-rare.)  Once cooked, cover the steak with foil and allow to rest for 10 minutes.  Just before serving, thinly slice the steak against the grain.

While the steak cooks and rests, prepare your sriracha mayo by combining the mayonnaise and sriracha sauce.  Also, if desired, slightly toast the inside faces of the sliced baguettes on the grill.

To build your Vietnamese Banh Mi Steak Sandwiches, start by spreading a liberal amount of the sriracha mayo on the bottom face of each toasted baguette.  Layer the thinly sliced cucumbers on top of the mayo and then arrange a generous amount of the steak over the cucumbers.  Use tongs to transfer the drained carrots and radishes over the steak (don’t soak your sandwich with extra pickling liquid) and finish off your sandwich with a garnish of cilantro and the top half of the baguette.  Serve with a cold, light beer and enjoy!

Banh Mi Sandwich

Grilled Shrimp Salad with Mediterranean Lemon Dressing

Matt and I are getting married in 2 days! All of our wedding prep is pretty much done and now we’re just relaxing and waiting for the weekend to get here. (Oh, and also checking the weather about a million times a day… Tropical Storm Andrea better hurry up and get out of here in time for our outdoor ceremony on Saturday afternoon!) 🙂

We’ve been going out to eat a lot lately but we did make one planned meal this week using a new cookbook that my mom got us as a wedding present. The book is entitled Salad for Dinner so, as you might guess, our meal was a nice and hearty entree salad! This was a fresh, summery meal that was perfect for the warm weather we had earlier this week. Doesn’t it look yummy?

Grilled Shrimp Salad with Lemon Mediterranean Dressing

Grilled Shrimp Salad with Mediterranean Lemon Dressing (from Salad for Dinner)

For the Mediterranean Lemon Dressing…
1 tablespoon Tahini (ground sesame seed paste)
2 cloves Garlic, pressed through a garlic press
1/2 teaspoon Salt
1/4 cup freshly squeezed Lemon Juice
1/3 cup Extra Virgin Olive Oil

For the salad…
1 lb. large Shrimp, peeled and deveined
2 tablespoons Olive Oil
1-2 cloves Garlic, pressed through a garlic press
8 oz. Mini Bell Peppers
8 cups Baby Spinach
1 pint Cherry Tomatoes, sliced in half
2-3 Persian Cucumbers, sliced into 1/4″ rounds
1/4 – 1/2 Red Onion, very thinly sliced
Feta Cheese, crumbled
Fresh Oregano Leaves
Lemon Wedges
Pita Bread Crisps*

Directions:
Combine all of the dressing ingredients in a jar. Close the lid and shake vigorously to combine. (You could also use a bowl and whisk the ingredients together if you don’t feel like shaking.) Refrigerate the dressing until you are ready to use it.

Mix together the shrimp, garlic and olive oil in a large bowl. Cover and refrigerate for at least 1 hour. After the shrimp has marinaded, remove from the fridge and stir in the mini bell peppers. Grill the shrimp and bell peppers over medium-high heat. When the shrimp turn pink (3-5 minutes), remove them from the grill and set aside. Continue cooking the bell peppers until they are soft and blackened in spots.

In a large salad bowl, combine the spinach, tomatoes, cucumbers and onion. Dress with the Mediterranean Dressing and mix well. (I used about half of what the recipe made.) Toss in the warm shrimp and bell peppers. Serve the salad in shallow bowls with pita crisps and garnish with feta, oregano, and lemon.

Grilled Shrimp Salad

Grilled Shrimp and Bell Pepper Salad Close Up

*To make pita bread crisps, slice pita bread into 1 – 1 1/2″ strips. Place on a cookie sheet, brush lightly with olive oil and season with salt. Bake in a preheated 425°F oven for approx. 10 minutes, turning once, until golden brown.

Carnitas Tostadas

A few weeks ago we made delicious pork carnitas tacos during our Engagement Photo Session. To make those carnitas, we slow-cooked a bone-in 4 lb. pork butt for 8-10 hours and then shredded it and seasoned it once it was fully cooked. That recipe turned out great but we decided to try a (slightly) quicker version of these tasty pork bites just to see how they would differ. In this latest version, the pork is cut up into 1 1/2 inch cubes before cooking, then slow-cooked with an array of seasoning for just 6 hours.

Pork Carnitas Tostadas

The resulting pork was tender and juicy and quite different in flavor and texture than our first take on carnitas. I think that I maybe liked these a little better, but they also required more prep work so it’s really a toss up depending on how much time you have! We used our carnitas to build Mexican tostadas… towers of beans, pork, cheese, salsa, and sour cream atop crispy, fried corn tortillas. Yum!

Pork Carnitas Tostadas

Pork Carnitas Tostadas

Ingredients for the Pork Carnitas:
(Carnitas recipe from Williams-Sonoma’s The New Slow Cooker Cookbook)
2 lb. Boneless Pork Shoulder, trimmed of excess fat and cut into 1 1/2 inch cubes
3 cloves Garlic, minced
2 teaspoons Dried Mexican Oregano
1 teaspoon Cumin
1 tablespoon Sherry Vinegar (we substituted in 2 tsp Apple Cider Vinegar & 1 tsp Sherry)
Salt and Pepper
1 Yellow Onion, quartered
3 Bay Leaves
1/4 teaspoon Cayenne Pepper
1/2 teaspoon Chile Powder

Ingredients for the Tostadas:
1 – 15 oz. can Refried Beans
1/2 Jalapeño Pepper, finely chopped
Peanut Oil
6 Corn Tortillas
Shredded Cheese (we used a mix of Mozzarella and Mexican blend)
Salsa
Sour Cream
Chopped Cilantro, for garnish
Lime wedges, for garnish

Directions:
To make the pork carnitas, mix together the first six ingredients (pork thru salt & pepper) in a slow cooker. Add in the onion and bay leaves, then cover and cook the pork on low for 6 hours. When cooking is complete, use a slotted spoon to transfer the pork to a plate or bowl. Skim the fat off of the cooking liquid and remove and discard the onion piece and bay leaves. Pull the pork apart using two forks, then season with the cayenne pepper and chile powder (to taste) and add in several spoonfuls of the cooking liquid until the pork reaches your desired level of juiciness.

To make the tostadas, start by combining the refried beans and chopped jalapeño in a microwaveable bowl. Heat the beans in the microwave on high for 2 minutes and stir well.

Meanwhile, coat the bottom of a small frying pan with peanut oil (enough to just allow a tortilla to float on the oil but not enough to submerge it completely). Heat the oil over high heat and then, using tongs, carefully place one tortilla in the oil. The oil around the edge of the tortilla will boil rapidly. (If it doesn’t bubble, increase the heat until it does.) Allow the tortilla to fry in the oil until the bottom side turns golden brown, then use your tongs to flip the tortilla over and fry until that side is golden brown as well. Transfer the tortilla to a paper towel-lined plate, then repeat this frying process with the remaining tortillas.

To assemble your tostadas, cover one side of each tortilla with a liberal amount of the bean mixture. Top with a few spoonfuls of the pork carnitas, then sprinkle a handful of shredded cheese on top. Broil the tostadas for 2-3 minutes or until the cheese is melted. Top with spoonfuls of salsa and sour cream and garnish with cilantro and lime juice. Serve with a cold beer and enjoy!

Pork Carnitas Tostadas

Fun Recipes for Cinco de Mayo

I love preparing and eating Mexican foods. Although I don’t normally need an excuse to make a batch of salsa or a tray of enchiladas, the upcoming Cinco de Mayo holiday gives us all a good reason to have some fun with Mexican flavors in the kitchen! Here are some recipes that would be perfect for the occasion:

(Scroll down for links to each recipe.)

Matt and I are going to celebrate the holiday a few days late with a “Diez de Mayo” potluck party. We’re going to provide margaritas along with rotisserie chicken and pork carnitas tacos for our friends and then they’ll bring additional dishes with them. I can’t wait!!

Our Fiesta invitation postcards for Diez de Mayo

Do you have any special party or food plans for Cinco de Mayo? Please tell me about them in the comments section! 🙂

Recipe Links for the Cinco de Mayo Dishes shown above:
Pork Tinga TacosMargaritas on the RocksChorizo-Bean Tortas
Rotisserie Chicken BurritosPoblano Sausage TacosFrozen Strawberry Margaritas
Salsa Verde EnchiladasPozole VerdeJalapeño Garlic Chicken Quesadillas

Stuffed Poblano Peppers

On Sunday we didn’t feel like going grocery shopping so we decided to improvise a dinner using the ingredients that we had in the fridge.  It just so happened that we had poblano peppers and turkey chorizo sausage, so we created this yummy Tex-Mex style recipe for peppers stuffed with sausage, beans and rice!

Stuffed Poblano Peppers

Poblano Peppers Stuffed with Chorizo, Beans, and Rice

You will need…
1 tablespoon Olive Oil
1/2 Yellow Onion, finely chopped
1/2 Jalapeño Pepper, seeds discarded and finely chopped
2 fresh Chorizo Sausages, casings removed
10 oz. cooked White Rice
10 oz. (about 2/3 can) Black Beans, rinsed and drained
3/4 cup Frozen Corn
1/2 teaspoon Chile Powder
1/4 teaspoon Cayenne Pepper
1 1/2 teaspoon Cumin
1 teaspoon Mexican Oregano
Salt and Pepper to Taste
3-4 Poblano Peppers, halved lengthwise with seeds and ribs removed
Shredded Cheese (we used a mixture of Mexican blend and Mozzarella)
Sliced Green Onion, for garnish
Chopped Cilantro, for garnish (we didn’t have any but it would be a nice addition!)

Directions:
Heat the Olive Oil in a large skillet or wok over medium-high heat.  Add in the onion and jalapeño and saute until the onion softens slightly, about 2 minutes.  Use a spatula to push the onion mixture to the sides of the pan, then add the sausage and saute until browned and cooked through, about 8 minutes.  Stir the sausage while it cooks to break it up into crumbled bits.

Reduce the heat to medium and stir in the rice, beans, and corn.  Sprinkle in the seasonings (chile powder thru salt and pepper) and stir well to combine.  Taste the mixture and adjust the seasoning to taste if desired.

Meanwhile, cook the poblano pepper halves in the oven or on a grill. (Although we did not do this when we made the recipe, we later concluded that softening the peppers slightly before stuffing them would improve their taste and texture in the final dish.)  To do this in the oven, place the peppers on a baking sheet and broil until the flesh softens but still holds its shape (it’s OK if black spots appear).  To do this on a grill, place the peppers over direct medium heat and grill until the flesh softens but still holds its shape  Place the cooked peppers on a baking sheet and spoon the rice and sausage mixture into each pepper.  Top liberally with shredded cheese, then bake in a 375°F oven for 20 minutes or until the cheese begins to brown.

Stuffed Poblano Peppers before melting

Transfer the baked peppers to a serving dish and garnish with green onion and cilantro.  Enjoy!

Stuffed Poblano Peppers

Mediterranean Quinoa Salad

We are at the point in the wedding process where glorious wedding gifts are occasionally waiting for us by the garage when we get home from work.  (Thank you friends and family!!!)  One gift that’s had an immediate impact on our cooking habits is our amazing Zojirushi rice cooker.  This countertop gadget cooks every type of grain imaginable and it’s incredibly easy to use.  It’s also so satisfying to pop open the top at the end of the cook time and find perfectly cooked, fluffy, steaming hot rice.  Yum!

In addition to cooking the perfect pot of rice, the Zojirushi can cook quinoa, a protein-packed ‘superfood’ that, according to wikipedia, is actually more closely related to beets and spinach than grains.  Quinoa can easily be substituted in for grains in a well-rounded meal so, armed with our new rice cooker, Matt and I decided that we’d try our hand at a nice summery quinoa salad.  I found a great looking recipe on Garnish with Lemon and, after a few small tweaks (because I never follow recipes exactly), we ended up with a delicious, healthy salad that we’ll continue to enjoy all week for lunch.

Mediterranean Quinoa Salad

Mediterranean Quinoa Salad (adapted from Garnish With Lemon)

You will need…
1 1/2 cups raw Quinoa (or about 6 cups cooked Quinoa)
1/3-1/2 cup Red Wine Vinegar
1/2 cup Extra Virgin Olive Oil
1/2 Red Onion, finely chopped
1 Red Pepper, chopped
1 Cucumber, peeled and chopped
1 pint Cherry Tomatoes, quartered
1/2 cup Kalamata Olives, halved
1/2 – 1 cup Crumbled Feta Cheese
1 teaspoon Salt
1/2 teaspoon Pepper
Juice of 1/2 – 1 Lemon

Directions:
Cook the quinoa on the stovetop according to the package instructions or, if you have a rice cooker, cook it in the rice cooker on the normal white rice setting with a 2:1 water to quinoa ratio.  When cooking is complete, transfer the quinoa to a large bowl, cool for 5-10 minutes and stir in the vinegar and olive oil.

Allow the quinoa to cool completely to room temperature, then gently stir in the next 6 ingredients (onion thru feta).  Season with salt and pepper (add more to taste if needed).  If you have the patience, chill the salad for 2 hours (we ate it immediately and it was still good) and “garnish with lemon” just before serving.

Mediterranean Quinoa Salad 5

Pork Carnitas Tacos

Yesterday Matt and I had our Engagement Photo Session with our wonderful wedding photographer, Melissa Hassey. Prior to the shoot Melissa suggested that Matt and I just relax and do what we normally would be doing on a Tuesday afternoon so we embraced that advice and decided to cook a big meal. That’s pretty much a typical weeknight, after all!

Our “Engagement Session Meal” consisted of slow-cooked pork carnitas tacos with lots of yummy sides including jalapeño-lime slaw, avocado crema, and fresh cilantro. We also enjoyed a pitcher of mojito limeade and a few cold beers. Yum!

I can’t wait to see how Melissa’s photos turn out. She actually snapped some of me taking pictures of our food before dinner while Matt waited patiently for me to finish which, once again, is a pretty normal part of our daily life together!  (Update: You can view one of Melissa’s photos of me taking photos of our carnitas here.)

Slow-Cooked Pork Carnitas Tacos (serves 2 with LOTS of leftovers for 2-3 lunches each!)

For the Pork…
3 ½ – 4 lbs. Bone-In Pork Butt, fat mostly trimmed off and discarded
Salt and Pepper
3/4 cup Apple Cider Vinegar
1 1/2 teaspoons Cumin
1 teaspoon Chile Powder
1/4-1/2 teaspoon Cayenne Pepper
3 teaspoons Mexican Oregano

Corn Tortillas (approx. 3 per person)

Toppings/Sides…
Jalapeño-Lime Slaw
Avocado Crema
Chopped White or Yellow Onion
Fresh Cilantro
Guacamole
Rice (or, better yet, Cilantro-Lime Rice!)
Lime Wedges
Tortilla Chips

Directions:
Generously salt and pepper both sides of the pork butt and place the meat into a slow cooker. Pour the vinegar into the slow cooker, cover, and cook on high for 8-10 hours.

When pork is finished cooking, remove the pork from the slower cooker and transfer to a large bowl. Pull the pork apart with two forks (or your fingers!) and discard the bone. Stir in the cumin, chile powder, cayenne pepper and more salt and pepper — feel free to adjust the seasonings to taste. Spread the seasoned meat out on a large baking pan and broil in the oven for 5-6 minutes until the edges start to get crispy.

Pour the cooking liquid from the slow cooker into a large measuring cup and then return the broiled pork to the slow cooker. Mix in the oregano, then pour some of the cooking liquid into the slow cooker and stir until the pork absorbs it. Keep adding more liquid and stirring until the pork reaches your desired moisture level. (We skipped this step yesterday and thought that our pork was a little dry but we’ll definitely do it next time!) Discard any leftover liquid and keep the pork warm until you are ready to serve it.

Meanwhile, prepare your toppings and sides as per their respective recipes. Just before serving, heat up the corn tortillas to make them pliable and yummy. Either microwave them in a damp paper towel for approx. 30 seconds or have fun with the grill and grill the tortillas over indirect high heat for 2-3 minutes.

To assemble your pork carnitas taco layer the pork, slaw, crema, onion, and cilantro onto a tortilla and enjoy!

Pork Carnitas Taco