Cumin-Scented Beef Stir Fry with Vegetables

I love my 14 inch carbon steel wok. Yup, I said it – LOVE!! Matt gave me a wok last year for my birthday and our old 12 inch frying pan has barely touched the stove since. We are constantly using the wok for a variety of culinary tasks such as sautéing peppers and onions, frying bacon, concocting the ideal combination of sausage and pasta, browning taco meat, and, of course, making delicious Asian stir fries.

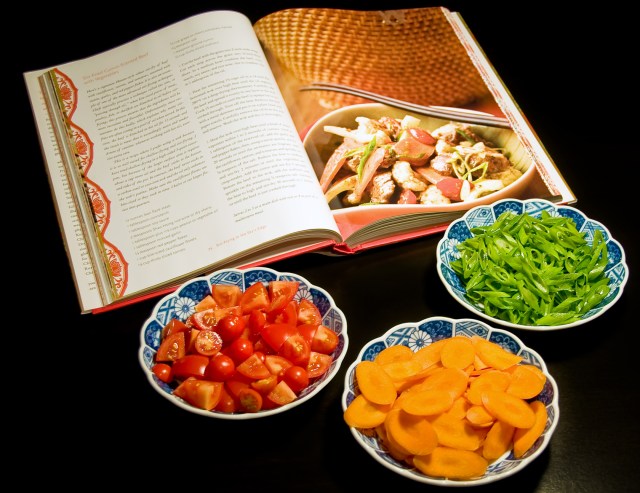
If you want to learn more about woks and the yummy creations that can be made in them, I recommend that you invest $23 to buy Stir Frying to the Sky’s Edge by Grace Young. In addition to featuring dozens of delicious recipes with full color photos, this book includes several pages of clear, concise instructions that cover techniques like seasoning a wok, slicing fresh ginger, shredding scallions, and properly cutting a variety of meats and poultry.

We’ve spent the last year honing our stir frying skills on several of the recipes in the book including Kung Pao Chicken, Mongolian Lamb, and Hot Pepper Beef. Here’s the recipe for our latest dinner from the cookbook: Cumin-Scented Beef with Cauliflower, Carrots, Tomatoes and Green Onions… yum!!

Cumin-Scented Beef Stir Fry with Vegetables (from Stir Frying to the Sky’s Edge)

You will need…
12 oz. Flank Steak, cut against the grain into ¼ in wide strips
1 tablespoon Corn Starch
1 tablespoon Soy Sauce
2 teaspoons Dry Sherry (or Rice Wine if you have it)
1 tablespoon Peanut Oil
1 ½ cups Canola Oil
1 tablespoon Garlic, Minced
½ teaspoon Red Pepper Flakes
1 cup Cauliflower Florets, cut into bit-sized pieces
½ cup Carrots, thinly sliced
½ cup Cherry Tomatoes, halved
¾ teaspoon Salt, divided
1 teaspoon Cumin
½ cup Green Onions, thinly sliced
10 oz. Cooked White Rice

Directions:
Combine the beef, corn starch, soy sauce, sherry, and peanut oil in a bowl and mix well. Heat the canola oil in a flat-bottomed wok over high heat until the oil is 280°F. (We used our normal meat thermometer to check the oil heat.) Add the beef to the oil and spread it evenly in a single layer on the bottom of the wok. Cook until the outside surface of the beef is just starting to change color, about 15 seconds, and then remove the wok from the heat. Carefully extract the beef from the oil with a kitchen skimmer and place on a paper-towel-lined plate.

Pour the oil into a large cup or bowl and set aside. Clean and thoroughly dry the wok and the return to the stove over high heat. Add 1 tablespoon of the reserved oil along with the garlic and red pepper flakes and stir fry for 20 seconds or until aromatic. Add the cauliflower, carrots, tomatoes, and ¼ teaspoon of the salt and stir fry 2-3 minutes. Add in the cumin and stir fry for 5 seconds. Return the beef to the wok and stir in the remaining ½ teaspoon salt and green onions. Stir fry for 30 seconds to 1 minute until beef is cooked through and ingredients are well combined. Serve with rice and enjoy!

Radiatori with Sausage and Garlicky Broccoli

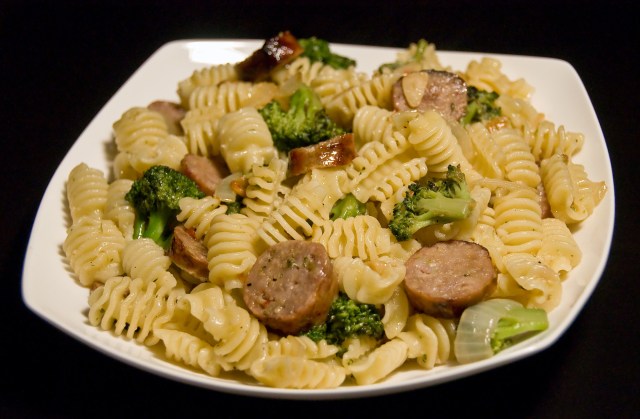
Matt has a knack for creating great flavors in meat and pasta dishes.  Some of my favorite recipes on this blog are entirely his creations (like Chicken Cutlets and Bucatini with Asparagus and Sausage in a White Wine Sauce!) and he carried on the tradition of melt-in-your-mouth deliciousness with this simple combination of sausage, broccoli and pasta.

If you don’t have broccoli on hand, you can easily substitute other in-season vegetables and feel free to try other types of sausage and pasta as well.  Last week Matt made a version of this dish using zucchini, Orecchiette, and freshly made Chicken Cordon Bleu sausage from Maiale and it was so delicious that we ate all of it before I had the presence of mind to snap a photo!

Radiatori with Sausage and Garlicky Broccoli

You will need:
6 Tablespoons Olive Oil, divided
10 cloves Garlic, sliced into thin discs
1 ½ – 2 cups Broccoli Crowns, cut into bite sized pieces
1 Yellow Onion, sliced into ¼ inch rounds and quartered
2 Sweet Italian Pork Sausages, grilled and sliced into bite sized pieces
1 teaspoon Chili Garlic Sauce (in the Asian food section of most grocery stores)
1 lb. Pasta, cooked according to package instructions (We used Garofalo’s Radiatori pasta)
Salt and Pepper to taste
Grated Parmesan Cheese

Directions:
In a large skillet or wok, heat 4 tablespoons of the Olive Oil over medium heat.  Add the sliced garlic and sauté until aromatic, 1-2 minutes.  Add the broccoli, stir well to coat with the oil, and allow to sauté for approximately 20 minutes, stirring only occasionally until broccoli starts to brown.  Remove broccoli and garlic from wok and set aside.

From left: Broccoli with garlic, onions, and finished, combined pasta dish

Add remaining 2 tablespoons Olive Oil to wok and return to medium heat.  Add the sliced onion and sauté, stirring frequently, until onions start to become translucent.  Add the cooked and sliced sausage and the chili garlic sauce and mix until the onion and sausage are evenly coated with sauce.  Return the broccoli to the wok and stir well to combine.  Taste and add salt and pepper as needed.

Carefully add the cooked and drained pasta into the wok and stir well to combine ingredients and coat the pasta.  Sprinkle on 1/4-1/2 cup of shredded Parmesan and mix well.  Enjoy with your favorite chilled white wine or, if you’re like us, with a good Oktoberfest-style beer!

Adding Some Pizazz to Weeknight Tortellini

Despite what you might think based on all of the semi-complicated recipes on this blog, there are plenty of nights when Matt and I resort to quick and easy dinners like take-out pizza, frozen dinner entrees, and basic pasta. One of our go-to pasta dinners is tortellini with a sprinkle of garlic powder and Parmesan cheese (healthy, I know!), but last week we decided to add a little pizazz to the dish by incorporating a few simple ingredients.

This entire meal only takes about 15 minutes to make… including the time it takes for your tortellini to cook! The asparagus gets added to the pasta water for the last few minutes and, after straining, all of the ingredients are tossed together in the same pot, making this a simple one-pot meal.

Quick and Easy Pesto Tortellini with Asparagus and Tomatoes (makes 3-4 servings)

You will need…
1 lb. Tortellini (we love Drake’s Frozen Cheese Tortellini)
1 bunch Asparagus, cut into 2″ pieces
2 tablespoons Olive Oil
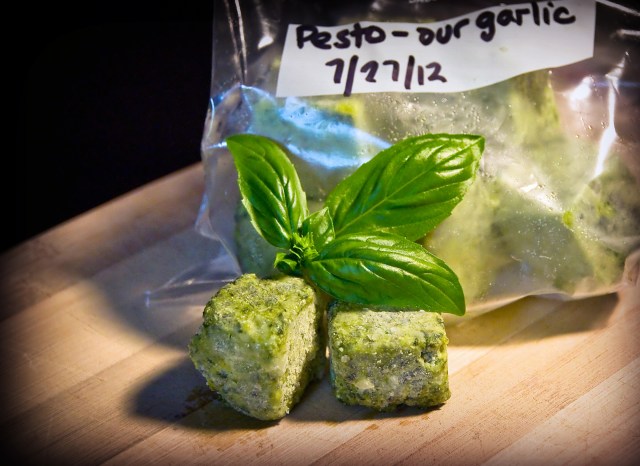
2-3 tablespoons Pesto (I used 2 “Pesto cubes” that I froze in an ice cube tray last week)
1 cup Cherry Tomatoes

Directions:
Bring a large pot of water to a boil and cook the tortellini according to package instructions. When there are 3-4 minutes left on the cook time, add the cut asparagus to the pasta water and allow the pasta to finish cooking. Drain pasta and asparagus and return the empty pot to the stove over medium-low heat. Add the Olive Oil and drop in your pesto “cubes.” Stir constantly as the pesto thaws. (If using fresh pesto you can skip this step.)

I made this pesto last week using basil and garlic from our garden. For easy storage I spooned the pesto into an ice cube tray and made 10 frozen pesto cubes — perfect for use in quick weeknight meals!

Add the hot pasta and asparagus back to the pot and stir to combine with the pesto (if the pesto wasn’t already completely thawed it will be after a few stirs!). Add in the uncooked tomatoes, stir a few more times, and serve!

Our First Garlic Harvest!

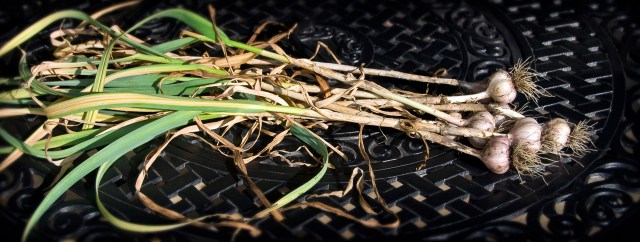
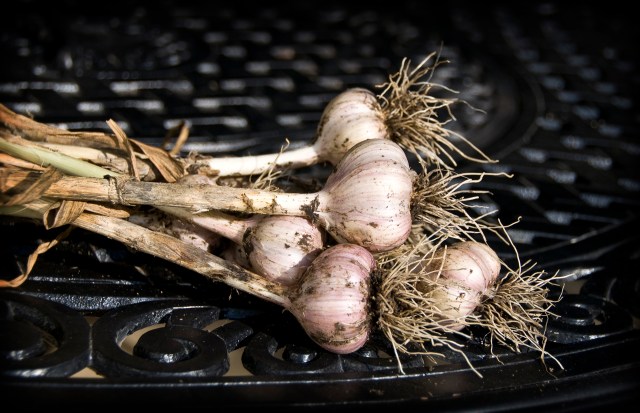
After 9 months of waiting our garlic is finally ready to harvest! I’m pleased to announce the successful unearthing of eight beautiful, nicely formed garlic bulbs.

I patiently waited for the bottom of the garlic plants to start turning brown before harvesting them. Since these plants are a “hard neck” garlic variety I was able to pull them out of the ground with my hands fairly easily. One of the bulbs was slightly damaged (a clove had over-ripened out of its papery skin) so I peeled the whole bulb and used it to make a large batch of pesto. I froze the pesto in an ice cube tray so we’ll be able to enjoy our garden’s garlic and basil several months from now.

Based on Mike McGrath’s advice, I am now “curing” our garlic in a single file row on our dining room table. The spot is air conditioned and out of direct sunlight so hopefully the garlic should be ready to store in a week or so. We use garlic pretty quickly in our household so those remaining seven bulbs should be long gone by October!

This garlic was amazingly simple to grow (just plant the cloves in October, cut the scapes in June, and unearth the bulbs in July) and we are excited to finally be enjoying our own garlic!!

Please remember to leave a comment in my Tomato Salad post to be eligible to win a digital kitchen scale!

Hot Pepper Beef

Who knew flank steak could be so delicious?!   I had heard of flank steak before but I’m embarrassed to say that I hadn’t actually ever cooked with it until a few months ago when we first tried this recipe.  Now we’re hooked!  In this stir fry, the flank steak takes center stage amidst a variety of green veggies in a sweet and spicy hoisin sauce.  The steak is juicy, tender, and flavorful and is light years beyond the rubbery, tasteless “steak strips” that you see pre-packaged in the supermarket.

This recipe comes from our awesome Stir Frying to the Sky’s Edge cookbook by Grace Young.  We tweaked the original recipe to add the fresh green beans and garlic scapes that I picked in our garden earlier this week.  Enjoy!

Hot Pepper Beef Stir Fry with Green Beans and Scapes (serves 2)

You will need…
12 ounces Flank Steak, cut with the grain into 1/4″ thick x 2″ long slices
3 cloves Garlic, minced
2 teaspoons Cornstarch
3/4 teaspoons Salt, divided
1/8 teaspoons Ground Black Pepper
2 teaspoons Soy Sauce
1 teaspoon plus 1 tablespoon Dry Sherry
1 tablespoon Ketchup
2 tablespoons Hoisin Sauce
1/2 cup Red Onion, thinly sliced
3 quarter-sized slices of Ginger, smashed
1/4 teaspoon Crushed Red Pepper
1 Handful Green Beans, trimmed
3 Garlic Scapes, cut into 3-4 inch pieces
Peanut Oil
1 Green Bell Pepper, cut into 1/4 inch slices
1 10 ounce package Jasmine Rice from Trader Joe’s, cooked

Directions:
Combine the steak, garlic, cornstarch, 1/4 teaspoon of the salt, black pepper, soy sauce, 1 teaspoon of the sherry, and 2 teaspoons cold water.  Stir well to coat the meat.  In a separate bowl or measuring cup, combine the ketchup, hoisin sauce, and the remaining 1 tablespoon of sherry.  In yet another bowl, combine the red onion, ginger, and crushed red pepper.  Place the green beans and garlic scapes in (yes, another) bowl.

Green beans and garlic scapes from my garden made a nice addition to this recipe.

Heat a wok over high heat until a drop of water vaporizes within 1 to 2 seconds.  Add a tablespoon of the peanut oil, swirl around the wok, and add the steak to the wok.  Spread the steak evenly over the bottom of the wok and let it sear undisturbed for 1 minute.  Then stir fry the steak for 1 minute and transfer it to a plate.

Add the remaining 1 tablespoon of peanut oil to the wok, swirl, and add the onion mixture.  Stir fry for 30 seconds, then add the green bean/scape mixture and continue to stir fry for 1 minute.  Add the green pepper, stir fry for 30 seconds, then add the steak and any accumulated juices back to the wok.  Add the remaining 1/2 teaspoon salt and the ketchup mixture and stir fry for 30 seconds until the steak is just cooked through.  Remove from heat and serve over rice.

Garlic Scape Pesto

After months of growth my garlic plants finally have scapes that are ready for harvesting.  Scapes are the “shoots” that garlic plants send up to flower as the bulb is still developing.  Because the bulb is not yet fully formed you are supposed to cut off the scapes so that plant can refocus its energy on the bulb.  The scapes themselves are packed with garlicky flavor and can be used in all sorts of recipes.  I’ll be posting more scape concoctions as the week goes on but for now I’d like to share this delicious recipe for Scape Pesto.

Oh, and before I post the recipe I have to brag about the rest of today’s garden harvest.  In addition to the scapes I also picked a handful of beautiful green beans, a large bunch of basil leaves, and three (yes, three!) strawberries.  🙂

Garlic Scape Pesto  (serves 2)

You will need…
2 Garlic Scapes
15-20 Large Basil Leaves
3-4 tablespoons Extra Virgin Olive Oil
1/4 cup Grated Parmesan Cheese
Salt and Pepper to taste

Combine all ingredients in a blender or food processor and chop until well blended.  Taste the pesto and add olive oil, salt, pepper, or Parmesan as needed to reach your desired flavor.

What can you do with your fresh Scape Pesto?

  • Serve it with Caprese Salad – that’s what we did!
  • Serve it over pasta
  • Enjoy it with a loaf of crusty rustic bread
  • Add it to a homemade pizza

June Is Bustin’ Out All Over – Garden Update!

My vegetables and herbs are growing like crazy!  We’ve had streaks of unusually hot weather (80-90°) punctuated by periods of relatively cooler weather (60-70°) here in Southeastern PA and it appears that my plants enjoy this every-changing variety of temperatures.  All of them have at least doubled in size in the last few weeks and several are already flowering or growing vegetables.

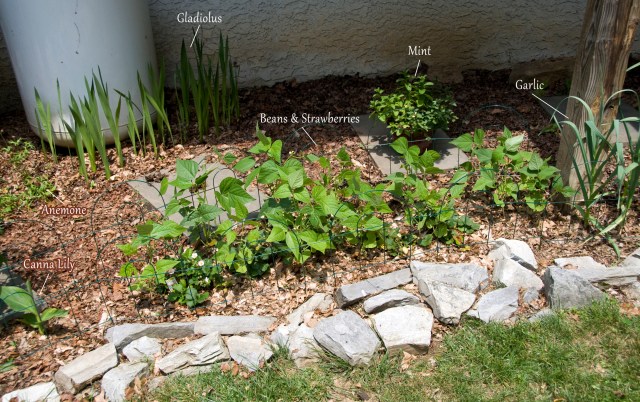
As of today the following plants are growing in my garden:

  • Jalapeño Pepper (planted in Spring 2011 and moved to a container for winter; several peppers ripening)
  • Garlic (planted last fall; scapes appearing)
  • Spinach (March; harvested)
  • Beans (March; transplanted and currently growing “real” green beans!)
  • Chives (April; in mixed container)
  • Marjoram (April; in mixed container)
  • Mint (April; 2 varieties in container)
  • Cherry Tomatoes (May; 2 staked in containers and flowering)
  • Tomatoes (May; 2 varieties in upside-down hanging containers and flowering)
  • Parsley (May; planted in one hanging tomato container)
  • Thyme (May; planted in the other hanging tomato container)
  • Strawberries (May; currently growing multiple unripe strawberries)
  • Serrano Pepper (May; in container and flowering)
  • Bush Belle Peppers (May; 2 varieties – one is already growing multiple green peppers)
  • Jalapeño Pepper (May)
  • Basil (9 plants) (May)
  • Pumpkins (“spontaneous” pumpkin patch from last Halloween’s pumpkins!)

With the exception of our whitefly infestation, we’ve had a pleasant, easy time with our garden so far.  We mulched all of our plants with either shredded leaves or mostly-composted leaves from our spin bin and we have lots of little fences in place that have successfully kept Bailey away from the plants.  I’m just starting to be able to use my thyme, parsley, and basil for cooking and soon we will have strawberries, jalapeño peppers, and green beans to eat!

Here are a few pictures of my garden:

Last year’s jalapeño plant that I saved over the winter has a handful of peppers growing on it.

What a difference 3 weeks makes! Hanging tomato plants with thyme and parsley from 5/13 and 6/4.

Green beans are finally growing on my “St. Patrick’s Day” bean plants!

This spider guards my garlic plants – I think he probably set up shop here to catch a few whiteflies.

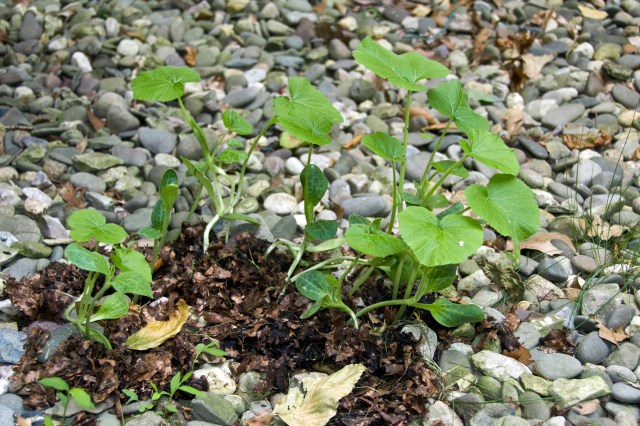
This is my latest discovery in the garden and one of my most exciting so far… a tiny pumpkin patch!! We left a few pumpkins here after Halloween last fall because they were too heavy for the spin bin composter and Voila! We have pumpkin plants! I contemplated moving the rocks back but then realized that the plants were actually rooted in/around the rocks so I just put a little compost over top and we’ll see what happens…

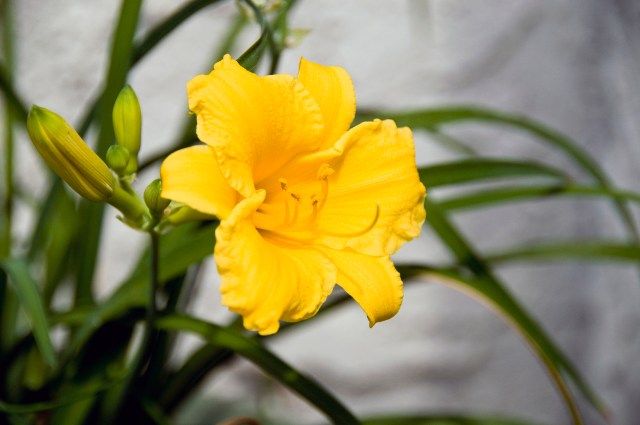
This day lily is potted in the same container with my chives, marjoram, and marigolds. True it its name, we’ve had at least one new bloom every day for several weeks now.

Yup, that’s a strawberry!! Looks like I’ll be eating it soon…

Matt’s mom gave us several garlic cloves last Fall and we had our first “scape sighting” this morning.  Woohoo! We’ll cut them off soon and think of something yummy to make with them.

We grew this zinnia plant from seed! I jumped the gun back in February and started lots of seeds indoors (waaaay too early in the season but hey, I’m learning!) and after a few weeks of struggling outdoors in April nearly all of the zinnia, cosmos, gallardia, and painted daisy plants that we grew are starting to bud. This plant was the first to flower.

Last but not least, our potted Oleander plant is flowering again! We bought it last year in late June when it was in full flower so it’s nice to see that it made it through the winter and is flowering once again. I love the big, white flowers.

How is your garden doing at the start of June?  Please share!  🙂

Related posts:
Vegetable Gardening Season has Arrived! 5.7.12
Gardening Update – One Month Later 4.17.12
Gardening… On St. Patrick’s Day! 3.17.12