Oven-Roasted BBQ Spare Ribs

Matt and I are eagerly awaiting the arrival of spring.  Until then, we’re attempting to brighten the last few days of winter with summery meals like tacos with lime-jalapeño slaw and pasta tossed with garlic and fresh veggies.  Last weekend’s summer-inspired food was a new one for us:  oven-roasted pork spare ribs with homemade barbecue sauce!

BBQ Pork Spare Ribs

Spare ribs are a thicker, meatier (and, in my opinion, more cartilage-filled) cut than the ‘baby back ribs’ that you’re likely to see in restaurants.  Spare ribs are an inexpensive cut (just $2.99/lb at Acme), so they were a good starting point for our first rib-roasting experience.  Nevertheless we agreed that next time we make ribs we’ll opt for the pricier and more tender baby backs.

From start to finish this recipe took about 6 hours but most of that time was hands-off oven-roasting.  The most time consuming part was making the barbecue sauce but if you don’t have time to do that you could easily use bottled sauce instead.  When you serve the ribs, make sure to have plenty of napkins on hand… these are juicy, saucy, and delicious!

Oven-Roasted Pork Spare Ribs (from The New Best Recipe)

Ingredients for the Dry Rub:
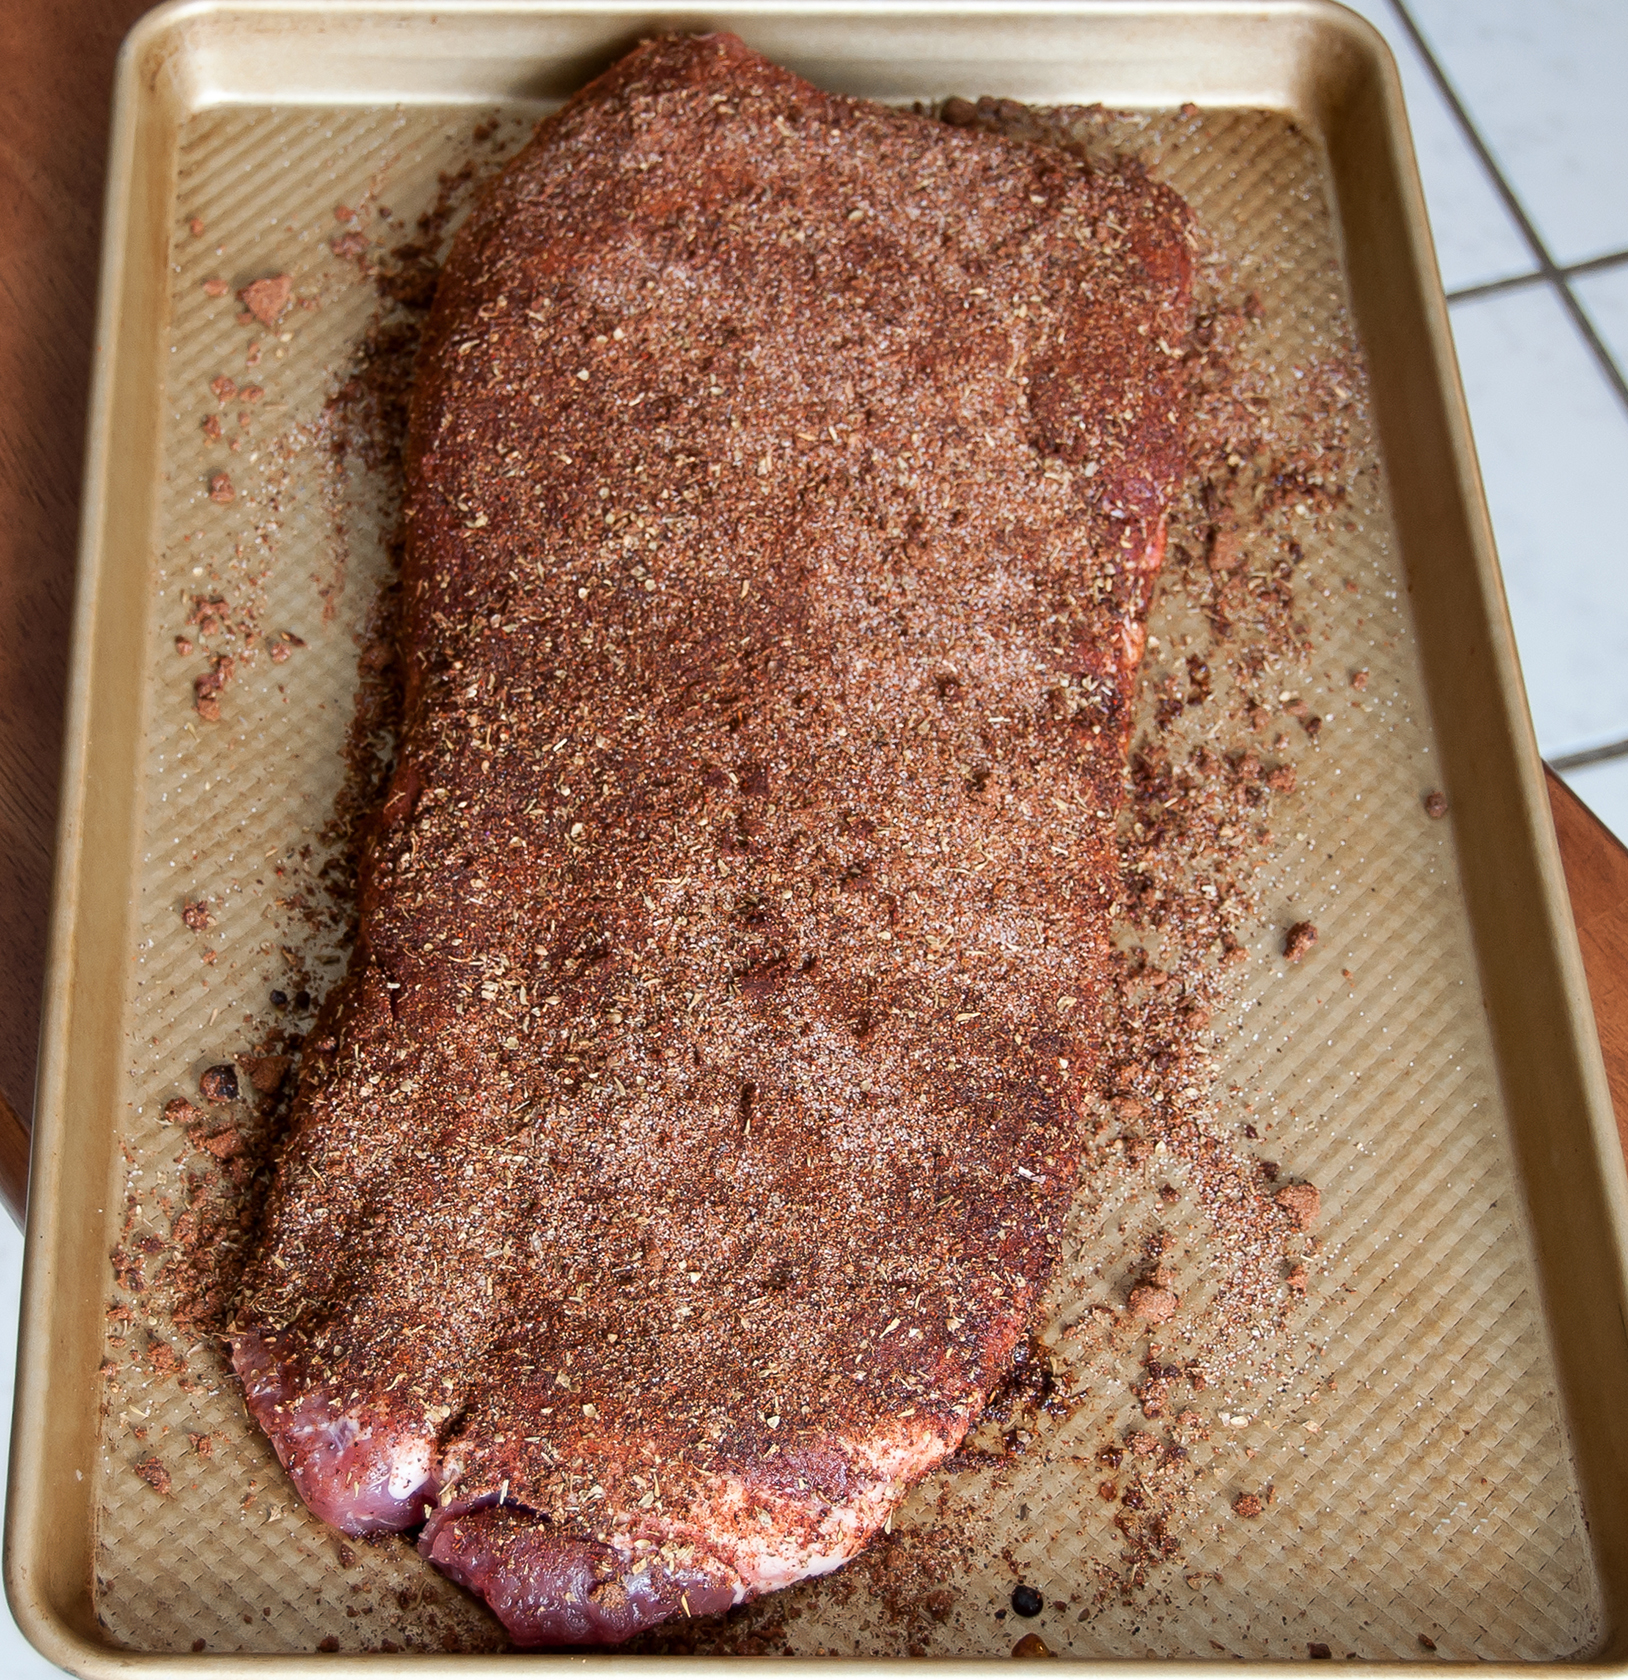
Dry Rubbed Pork Spare Ribs
1/8 cup Paprika
1 tablespoon Chile Powder
1 tablespoon Cumin
1 tablespoon Brown Sugar
1 tablespoon Salt
1 1/2 teaspoons Dried Oregano
1 1/2 teaspoons Sugar
1 1/2 teaspoons Ground Black Pepper
1 1/2 teaspoons Ground White Pepper
1/2 teaspoon Cayenne Pepper

Ingredients for the Ribs:
1 rack Pork Spare Ribs (approx. 3-4 lbs.)
Dry Rub (above)
1 1/2 cups Barbecue Sauce (homemade or bottled)

Directions:
Mix the dry rub ingredients together in a bowl.  Place the rack of ribs on a large rimmed baking sheet and, using your hands, spread the dry rub over the entire surface of the ribs (top and bottom).  We found the rub to be a little overwhelming so next time we make this I’ll probably only use about 3/4 of the rub.  Position the rubbed ribs meaty side up and allow to sit at room temperature for 1.5 hours.  (If desired, you could also cover and refrigerate the rack for up to 24 hours which will produce a very strong rub flavor.)

Roasted Pork Spare Ribs

After the ribs have rested, cover the baking sheet tightly with foil and place in a preheated 300°F oven on the middle rack.  Allow to roast for 1 hour, then remove the foil and continue roasting for another hour.  Remove the ribs from the oven and liberally apply about half of the barbecue sauce over the top (meaty side) of the ribs with a brush.  Return the ribs to the oven for another 1 1/2 hours.

When the ribs are done roasting, remove them from the oven and wrap the ribs (without the pan) completely in foil.  Place the foil-wrapped ribs in a paper bag and fold/crimp the top of the bag shut.  Allow the ribs to rest at room temperature in the bag for 1 hour.

After resting, unwrap the ribs and cut them between the bones with a sharp knife.  Serve with the remaining barbecue sauce and enjoy!

BBQ Pork Spare Ribs

BBQ Chicken Quesadillas

Over the holidays I discovered a blog called Natural Noshing while searching for a gluten-free meatball recipe to serve to our extended family.  Although I didn’t end up making the specific turkey meatball recipe that I found on Nora’s blog, I was enthralled by her beautiful photographs and delicious, clearly-laid out recipes.  I began to daydream about creating my own blog and, although I don’t have very much cooking experience and my photography has primarily been limited to dogs flying through the air, I eventually got up the nerve to start this blog!

I had originally planned to make Kung Pao Chicken in our wok tonight since this is one of our favorite meals and it hasn’t yet appeared on TheLittleGSP.  I had, in addition to the many sauces and oils needed for Kung Pao, some chicken breast and red bell pepper, and, as of 8:32am that’s what was for dinner.  That all changed at 8:33 when I got my automated WordPress notification that a new recipe was up on Natural Noshing.  The recipe?  BBQ Chicken Quesadillas with (you guessed it!) chicken and red pepper.  Perfect!

Before you read any further, you should definitely check out the original recipe and beautiful photos on Natural Noshing.  I am pretty stubborn about never quite following recipes exactly (I always tend to add extra onions, extra garlic and a shake or two of crushed red pepper for good measure…) so when in doubt follow Nora’s recipe, not mine!  🙂

BBQ Chicken Quesadillas  serves 2-3

You will need…
2 Chicken Breasts
1/2 Red Bell Pepper, diced
1/2 Red Onion, diced
Olive Oil
Salt and Pepper
1/3 cup Chopped Cilantro (apparently I like to be heavy-handed with Cilantro as well!)
Approx. 1/2 Cup Monterey Jack Cheese, shredded (I didn’t have the sharp cheddar that the original recipe called for)
6 Corn Tortillas (ours were Green Chile Corn Tortillas)
Approx. 3 Tablespoons of BBQ Sauce (we are using Homestyle Black Cherry Smokehouse BBQ Sauce from Whole Foods)
Sour Cream and Guacamole (optional but highly recommended!)

Directions:

Bring a large pot of water to a boil and add the uncooked chicken breasts.  Boil the chicken breasts for 10-15 minutes or until they are fully cooked through.  (I actually lost track of time as my chicken was boiling.  This is usually Matt’s job but he was at lacrosse practice so I did it myself.  He tells me that you cook them “until they are done” so just do that and you’ll be fine…).  Alternatively, you can avoid this chicken-boiling step by just using pre-cooked rotisserie chicken.

Remove the chicken from the water and shred it with two forks until it looks something like this:

Sauté the pepper and onion in a tablespoon or two of olive oil over medium heat until tender.  Salt and pepper to taste and then transfer the pepper and onion mixture to a bowl.

To assemble your quesadillas, place a corn tortilla in the pan that you just sautéed the peppers and onions in.  You’ll want the tortilla to sizzle in the oil without burning (this is a very fine line on our not-so-sensitive electric range).  Top the tortilla with cheese and pour a few drops of BBQ sauce evenly around the tortilla.  When the cheese starts to melt place a few pieces of shredded chicken and a thin layer of the pepper/onion mix on one half of the tortilla.  Sprinkle with cilantro and fold the “empty” side of the tortilla over onto the full side.

Allow the quesadilla to continue sizzling until the tortilla reaches your desired level of crispiness.

Serve with guacamole and sour cream!


BBQ Pulled Pork Sandwiches

When you hear “slow cooked pulled pork” do you think about state fairs and BBQ joints in the deep south?  I love pulled pork and when I learned that we could make our very own version of this delicious summer treat with only a crock pot, apple cider vinegar, and a bottle of BBQ sauce I was thrilled!

This is probably one of the easiest and most rewarding recipes that I’ll share on TheLittleGSP.  We put the pork in the crock pot before work and come home to the aromas of slow-cooked meat.  5 minutes of “pulling” later and the pork is ready to enjoy on a nice soft sandwich bun.  This recipe is adapted from instructions that I found on about.com.


Slow-Cooker BBQ Pulled Pork Sandwiches
(makes 6-8 sandwiches)

You will need…
3-4 lbs. “Pork Butt” (also called “Boston Butt” or Pork Shoulder)
3/4 cup Apple Cider Vinegar
Salt and Pepper
A Bottle of BBQ Sauce (our current favorite is Sticky Fingers Carolina Sweet)
6-8 Sandwich Rolls (we love the burger rolls from The Fresh Market)

Directions:

Trim any excessive fat off of the pork and place the meat in your slow cooker.  Season the pork with salt and pepper on both sides.  Pour the apple cider vinegar into the slow cooker around the pork (don’t pour it directly over the top of the pork or you will wash the salt and pepper off).  Set the slow cooker to High and put the lid on.  Allow the pork to cook for approximately 10 hours.

Pork Butt ready to be cooked for 10 hours

After 10 hours have elapsed, use two forks to transfer the pork to a plate (it will be falling apart at this point so you may have many little pieces of pork already).  Dump the apple cider vinegar and juices out of the slow cooker, then return the pork to the pot.  If your pork butt had a bone, locate and discard the bone.  Use the two forks to pull the pork apart into several large pieces (but don’t completely shred the pork yet).

Add the bottle of BBQ sauce to the pork.  If your piece of meat was on the smaller side you may want to only add about 3/4 of the bottle first (you can always add more later if you want a wetter sandwich).  Use the two forks to mix the BBQ sauce into the pork and pull the pork until it reaches your desired texture.

BBQ Sauce Added and Pork Pulled!

Slice open the sandwich rolls.  If you want, broil them face-up in the oven for 3-4 minutes until golden brown.  Place a heaping mound of pulled pork onto your roll and enjoy!

Best Sides to Eat with your Pulled Pork Sandwich:

  • Baked Beans (I recommend Bush’s Southern Pit BBQ Baked Beans)
  • Corn and Black Bean Salad (I’ll post the recipe next time I made this!)
  • Corn on the Cob
  • Macaroni and Cheese
  • Apple Crisp