No-Bake Coconut Cream Pie

Hello!  I’ve been pretty bad about posting lately but I have a good excuse… Matt and I are getting married in 11 days!  That means that I’ve been busy making wedding things (place cards, welcome bags, menus, programs, burlap table runners…the list goes on) and doing pre-wedding activities like wine-tasting at our venue, Grace Winery, taking first-dance dance lessons (we’re doing the rumba!), writing our ceremony and going to dress fittings.  Whew!

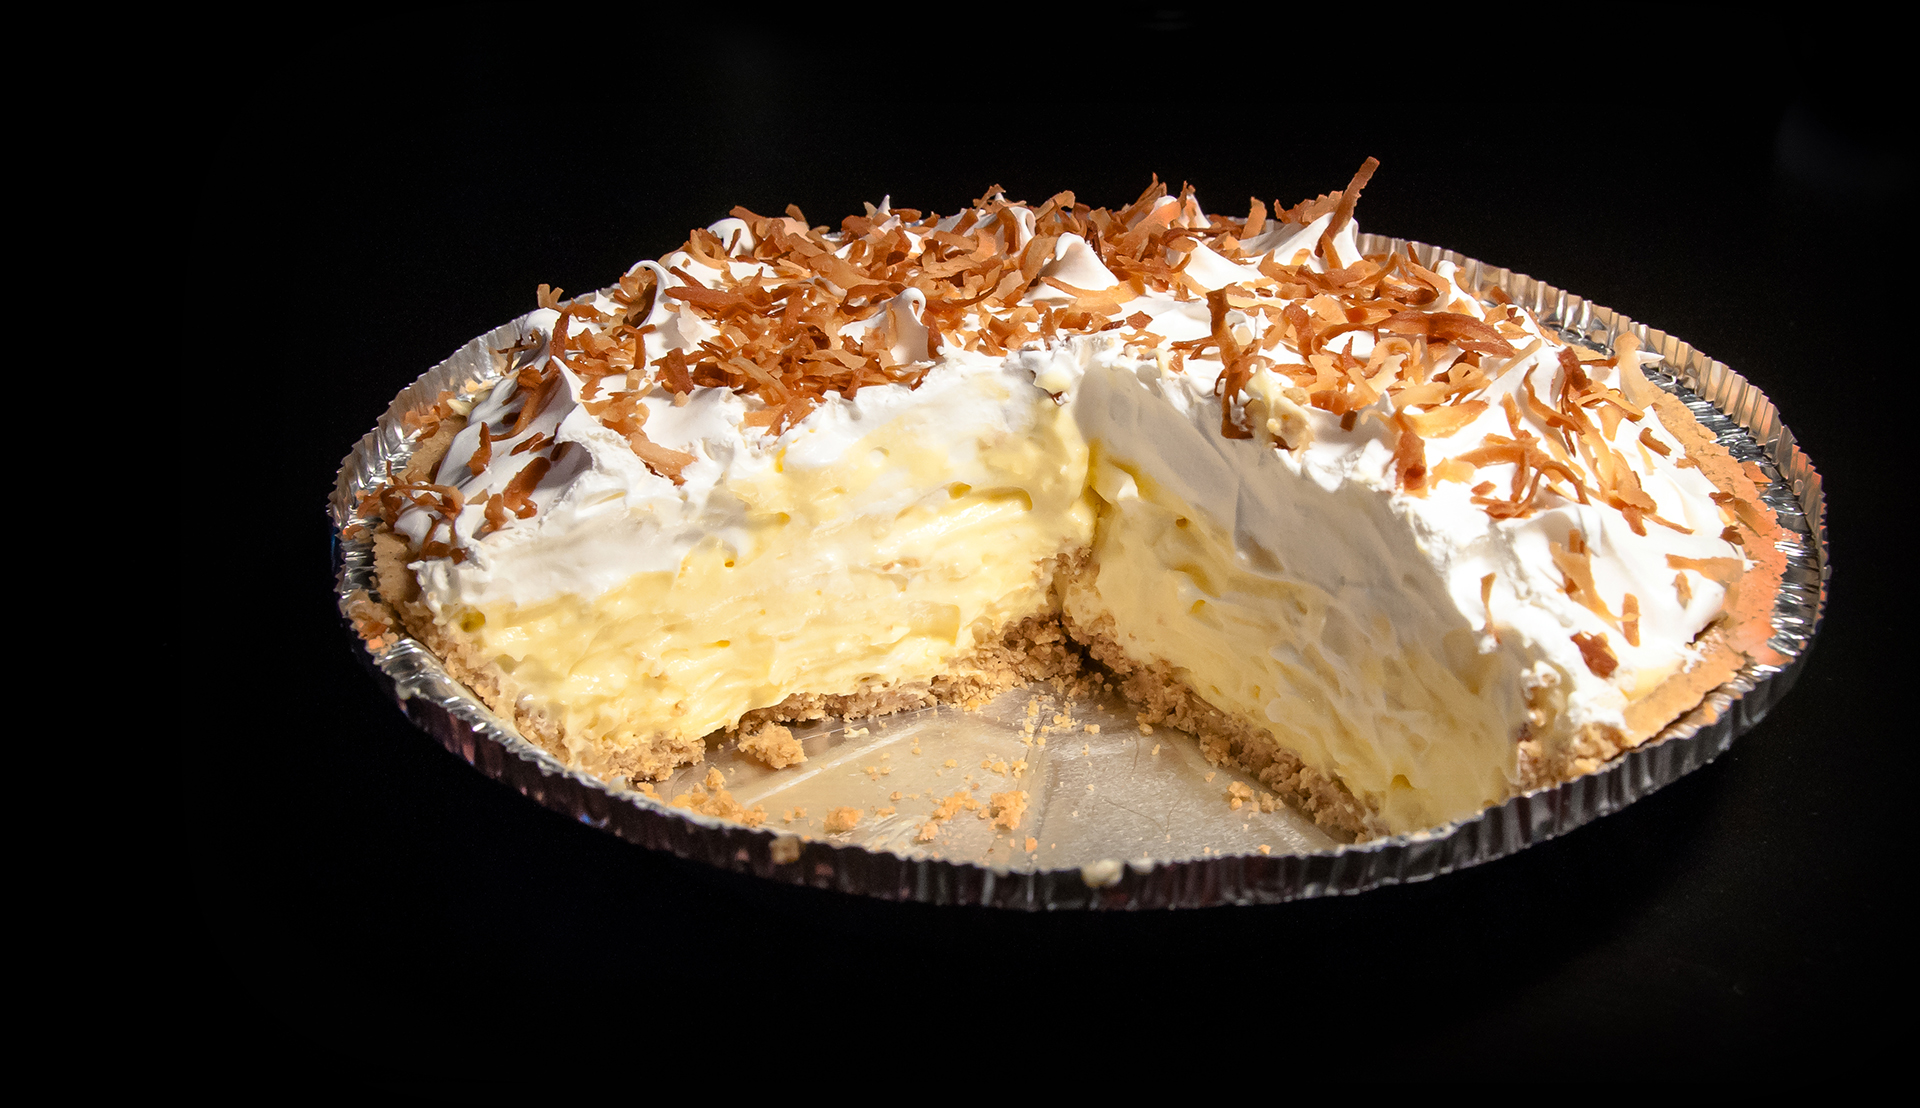
But, enough about the wedding… this post is about PIE!  Easy, no-bake coconut cream pie, to be exact.  🙂  This is our second foray into the world of no-bake pies (see our Peanut Butter Cream Pie for the first) and it further solidified our love of these super-simple desserts.  We used store bought pie crusts, pudding mix, and cool whip and the whole recipe only took about 20 minutes of “active” time.  Perfect!

Coconut Cream Pie

Easy No-Bake Coconut Cream Pie (from Kraft.com; doubled to make 2 pies)

You will need…
4 – 3.4 oz. packages of JELL-O Vanilla Instant Pudding
4 cups Cold 1% Milk
1 – 16 oz. container Cool Whip Topping, divided
2 cups Sweetened Coconut Flakes, divided
2 store bought Graham Cracker Pie Crusts

Directions:
Beat pudding mixes and milk together in a large bowl of a stand mixer for 2 minutes.  Mix in about half of the cool whip (approx. 2 cups) and 1 ½ cups of the coconut.  Pour the mixture into the two pie crusts and refrigerate for at least 4 hours or until the pudding is set.  Store the remaining Cool Whip in the refrigerator (not the freezer) so that it will be spreadable later.

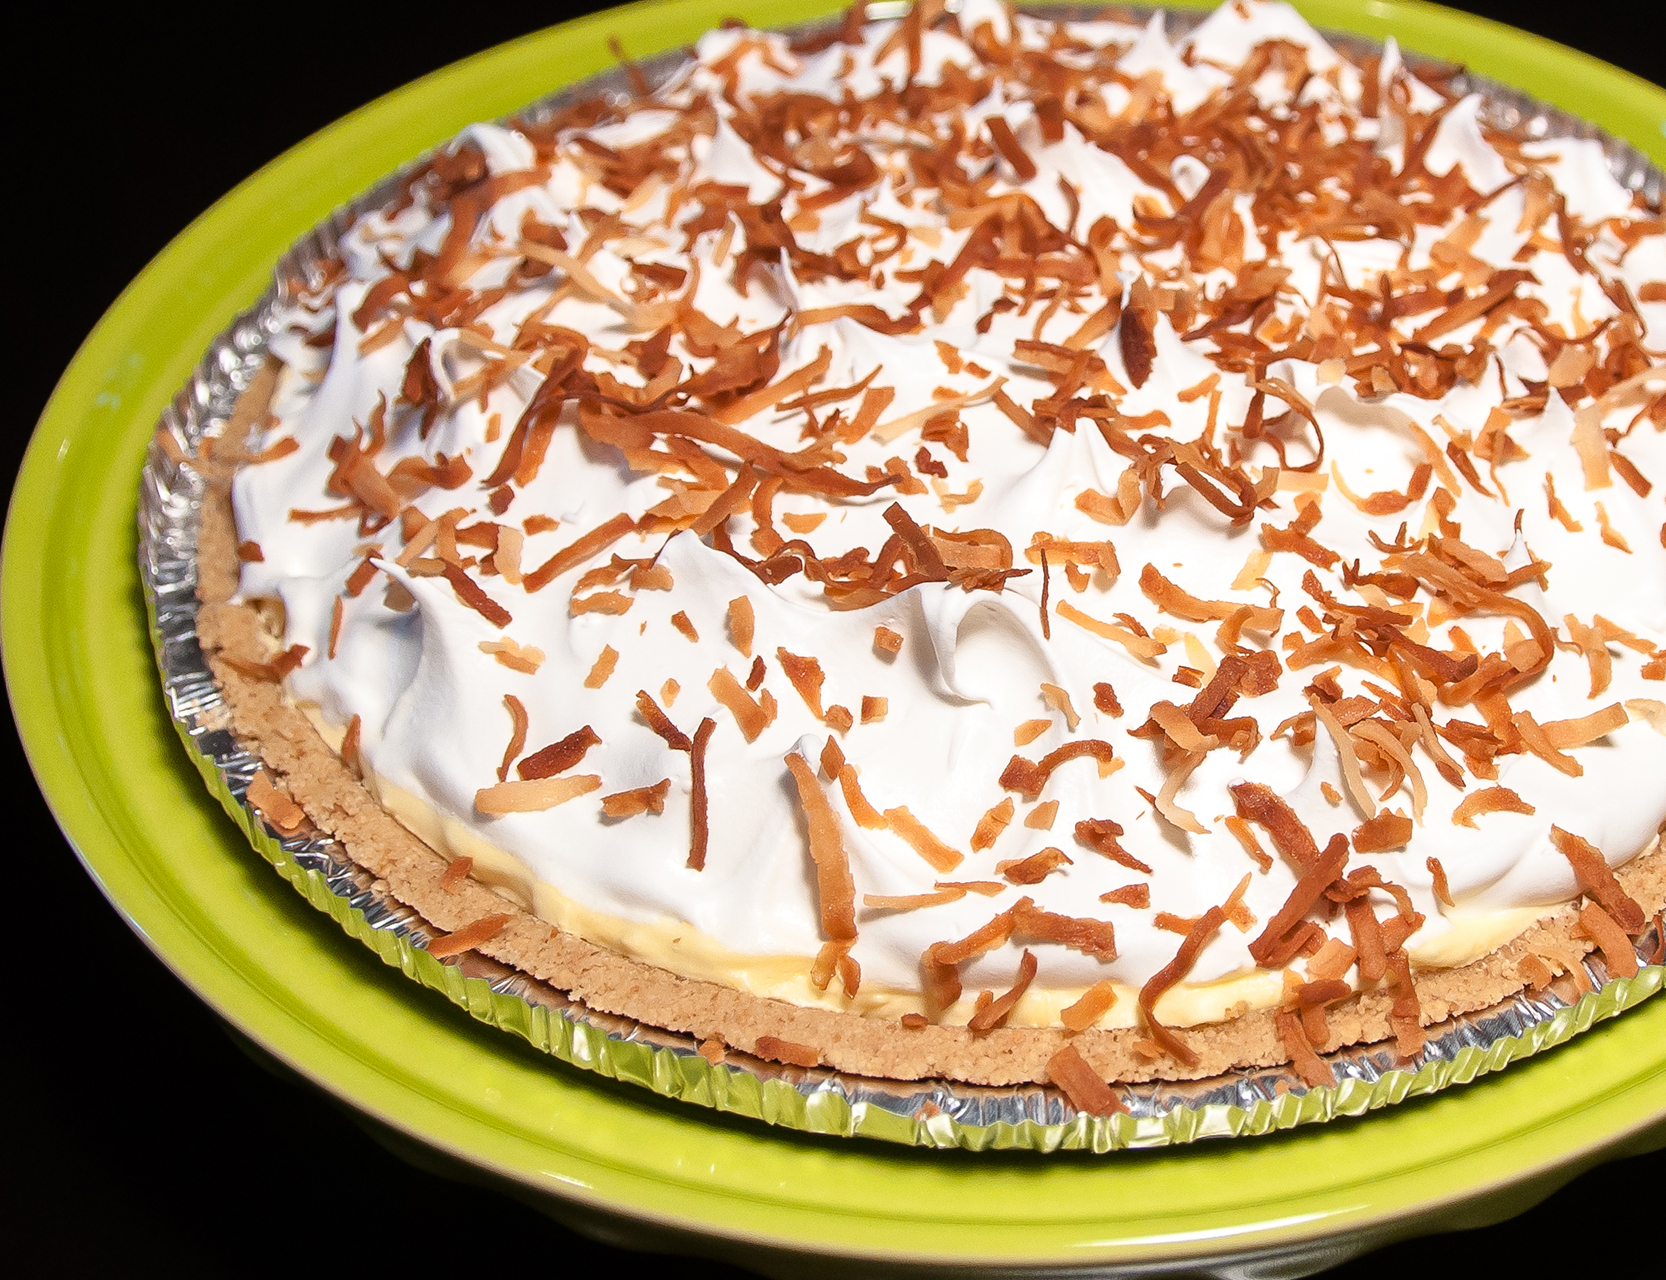
While the pudding sets, spread the remaining coconut out onto a baking sheet and toast in a preheated 350°F oven for 10-15 minutes.  Check on the coconut frequently and stir it to keep from burning on the edges.  The coconut is done when it turns golden brown.

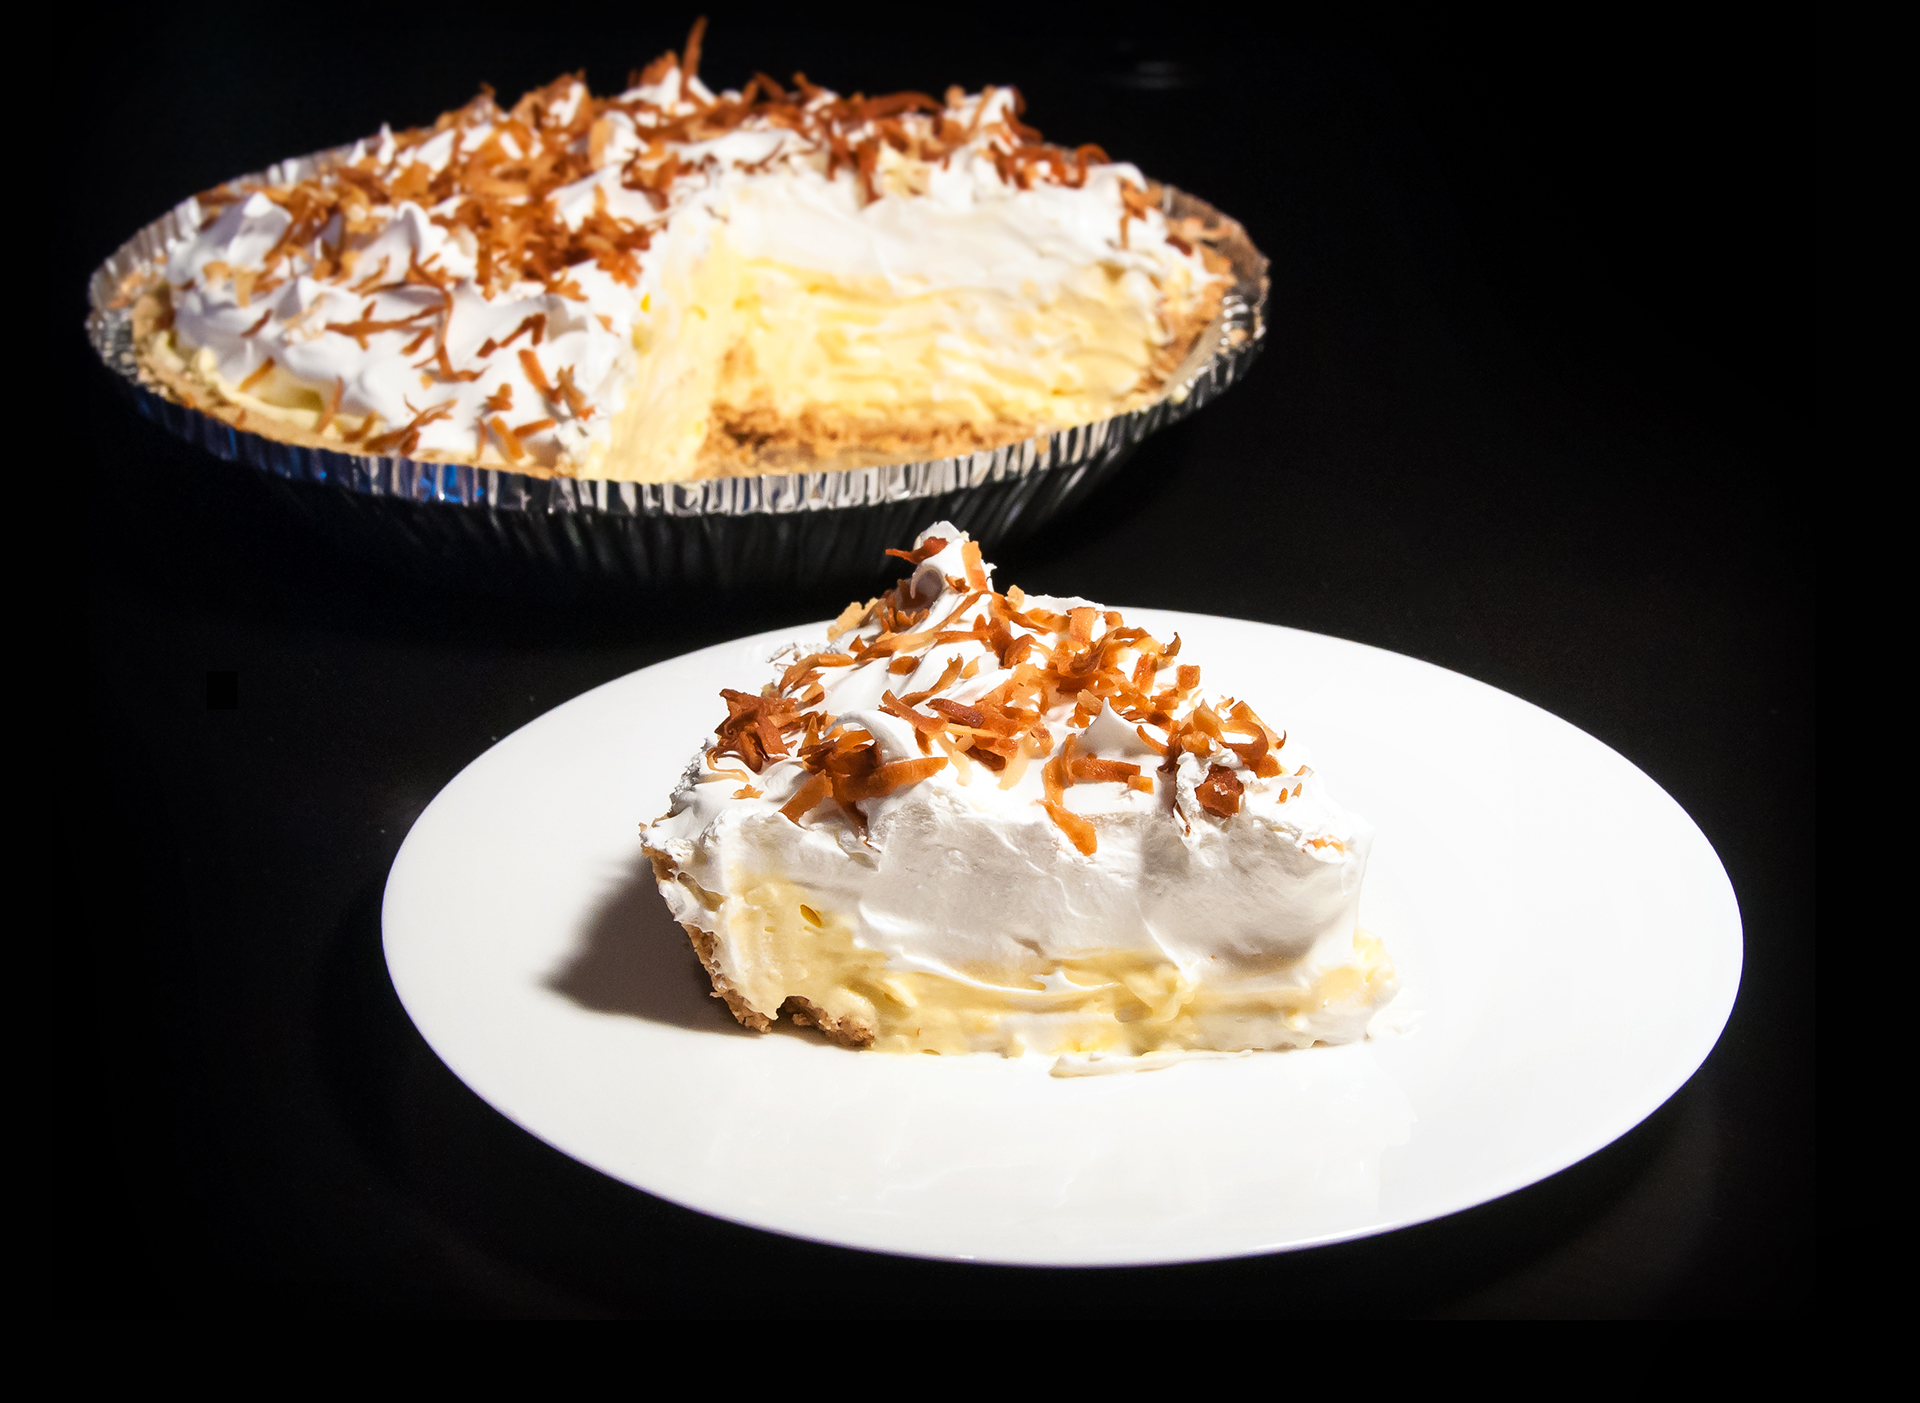
Take the two pies and the Cool Whip out of the fridge and top each pie with the remaining Cool Whip.  Sprinkle the toasted coconut over top and enjoy!

Coconut Cream Pie

Coconut Cream Pie Slice

Let the 2013 Gardening Season Begin!

My mail-ordered tomatoes and pepper plants arrived from Burpee on Thursday afternoon which means that my 2013 vegetable season has officially begun! Matt and I planted everything and, barring any stray digging from Bailey, now we can just sit back and watch our garden grow.

Once again I’m using hanging galvanized steel buckets to house my upside down tomatoes. The tops of each bucket have parsley, thyme and rosemary growing in them. I was really happy with how these dual tomato-herb buckets worked out last year and I can’t wait to see how they do this year!

Garden (5-10-13)

Between the hanging buckets, fenced-in garden, and pots on the patio, I now have Zucchini, Tomatoes, Parsley, Thyme, Rosemary, Strawberries, Garlic, Jalapeno Peppers, Poblano Peppers, Basil, Mint, Oregano and Beans growing in my garden.

We also have several flowers planted in the yard and in pots including Tulips, Zinnias, Canna Lilies, Gladiolus, Painted Daisies, Ranunculus, Dahlias, Gerber Daisies, Superbells, and Marigolds. I love all of the bright reds, oranges, yellows, and pinks of the plants that have flowered so far, don’t you?

Happy Gardening Season!!

Related Posts:

Happy Birthday, Bailey!

Happy Birthday, Bailey!

It’s Bailey’s 6th birthday today! I think a photo montage of my four-legged best friend is in order, don’t you?

Here are some of Bailey’s most memorable moments since her fifth birthday:

Happy Birthday, Bailey!

Carnitas Tostadas

A few weeks ago we made delicious pork carnitas tacos during our Engagement Photo Session. To make those carnitas, we slow-cooked a bone-in 4 lb. pork butt for 8-10 hours and then shredded it and seasoned it once it was fully cooked. That recipe turned out great but we decided to try a (slightly) quicker version of these tasty pork bites just to see how they would differ. In this latest version, the pork is cut up into 1 1/2 inch cubes before cooking, then slow-cooked with an array of seasoning for just 6 hours.

Pork Carnitas Tostadas

The resulting pork was tender and juicy and quite different in flavor and texture than our first take on carnitas. I think that I maybe liked these a little better, but they also required more prep work so it’s really a toss up depending on how much time you have! We used our carnitas to build Mexican tostadas… towers of beans, pork, cheese, salsa, and sour cream atop crispy, fried corn tortillas. Yum!

Pork Carnitas Tostadas

Pork Carnitas Tostadas

Ingredients for the Pork Carnitas:
(Carnitas recipe from Williams-Sonoma’s The New Slow Cooker Cookbook)
2 lb. Boneless Pork Shoulder, trimmed of excess fat and cut into 1 1/2 inch cubes
3 cloves Garlic, minced
2 teaspoons Dried Mexican Oregano
1 teaspoon Cumin
1 tablespoon Sherry Vinegar (we substituted in 2 tsp Apple Cider Vinegar & 1 tsp Sherry)
Salt and Pepper
1 Yellow Onion, quartered
3 Bay Leaves
1/4 teaspoon Cayenne Pepper
1/2 teaspoon Chile Powder

Ingredients for the Tostadas:
1 – 15 oz. can Refried Beans
1/2 Jalapeño Pepper, finely chopped
Peanut Oil
6 Corn Tortillas
Shredded Cheese (we used a mix of Mozzarella and Mexican blend)
Salsa
Sour Cream
Chopped Cilantro, for garnish
Lime wedges, for garnish

Directions:
To make the pork carnitas, mix together the first six ingredients (pork thru salt & pepper) in a slow cooker. Add in the onion and bay leaves, then cover and cook the pork on low for 6 hours. When cooking is complete, use a slotted spoon to transfer the pork to a plate or bowl. Skim the fat off of the cooking liquid and remove and discard the onion piece and bay leaves. Pull the pork apart using two forks, then season with the cayenne pepper and chile powder (to taste) and add in several spoonfuls of the cooking liquid until the pork reaches your desired level of juiciness.

To make the tostadas, start by combining the refried beans and chopped jalapeño in a microwaveable bowl. Heat the beans in the microwave on high for 2 minutes and stir well.

Meanwhile, coat the bottom of a small frying pan with peanut oil (enough to just allow a tortilla to float on the oil but not enough to submerge it completely). Heat the oil over high heat and then, using tongs, carefully place one tortilla in the oil. The oil around the edge of the tortilla will boil rapidly. (If it doesn’t bubble, increase the heat until it does.) Allow the tortilla to fry in the oil until the bottom side turns golden brown, then use your tongs to flip the tortilla over and fry until that side is golden brown as well. Transfer the tortilla to a paper towel-lined plate, then repeat this frying process with the remaining tortillas.

To assemble your tostadas, cover one side of each tortilla with a liberal amount of the bean mixture. Top with a few spoonfuls of the pork carnitas, then sprinkle a handful of shredded cheese on top. Broil the tostadas for 2-3 minutes or until the cheese is melted. Top with spoonfuls of salsa and sour cream and garnish with cilantro and lime juice. Serve with a cold beer and enjoy!

Pork Carnitas Tostadas